
Measuring, taping, and masking off the stripes can be an epic task just in itself. The stripes are not a uniform width all the way back, but tapered. The Shelby LeMans stripes specs and dimensions can be found here.
My stripes ran from the lowest front point of the car completely over the top to the lowest rear point of the car, so valance to valance.
Essential tools are 3M fineline tape (creates super sharp edge), regular automotive grade masking tape, 1.5 inches, masking paper, and masking plastic.
The distance between the two stripes is 2 inches. I cut strips of masking paper at the distances I need, and had a mark in the center. I used the center mark to align with a center pointed marked on the car panel, and then put a mark at each end of the masking 'tape'. I made my markings with a pencil. I only made my marks at the very front and rear, or top and bottom, of the panel. If the fineline tape is started so it starts at one mark, you can pull it in a tight straight line to line up with the second mark. On most of the panels there is a 'landmark' on the panel that is located exactly in the center, such as the gas cap, or license plate bracket for instance, or maybe a little screw for the window moulding trim, to help find the center. Care has to be taken in getting the fine line tape to adhere and stick tightly in tight corners. If it lifts the paint will creep under. Here's the thing: once the tape goes on the car, you should plan to finish the job and have it back off that same day. Never leave tape sitting on fresh base for extended periods of time.
Once the stripes are taped off with fine line, I taped off the center with masking tape. I also ran masking tape along the outer lines, and tape down 18 inch masking paper along the entire length of the lines on every panel. Then, painters plastic was taped to near the outside edges of the masking paper. Be sure to seal the grates of the cowl that are to remain body color well with tape. Otherwise the paint overspray will go down through the cowl grates and come up under your masking.
The striped areas are tacked off well. I first spray a light to medium coat of paint along the tape edges and let it sit for 20 min. This builds a bridge at the tape edges and prevents solvent creep. I then came back and sprayed 2-3 medium coats in the striped areas. After letting the white flash for 1 hr after the final coat, the tape is carefully pulled off. Slowly pull the tape off at a 45 degree angle away from the fresh tape. It was at this point where I marveled at how amazing the car looks.
It is inevitable that the tape will lift in some tight corners and the stripe color will creep through...mine did in several places. The fix for this is easy and fast. It can easily be sanded away with wet 1500 grit sandpaper. Just sand gently enough to scuff only the undesired paint away. This job took me a nonstop 12.5 hrs, from measuring and masking to pulling off the masking.
 |
| The stripes are first taped off with fine line tape. |
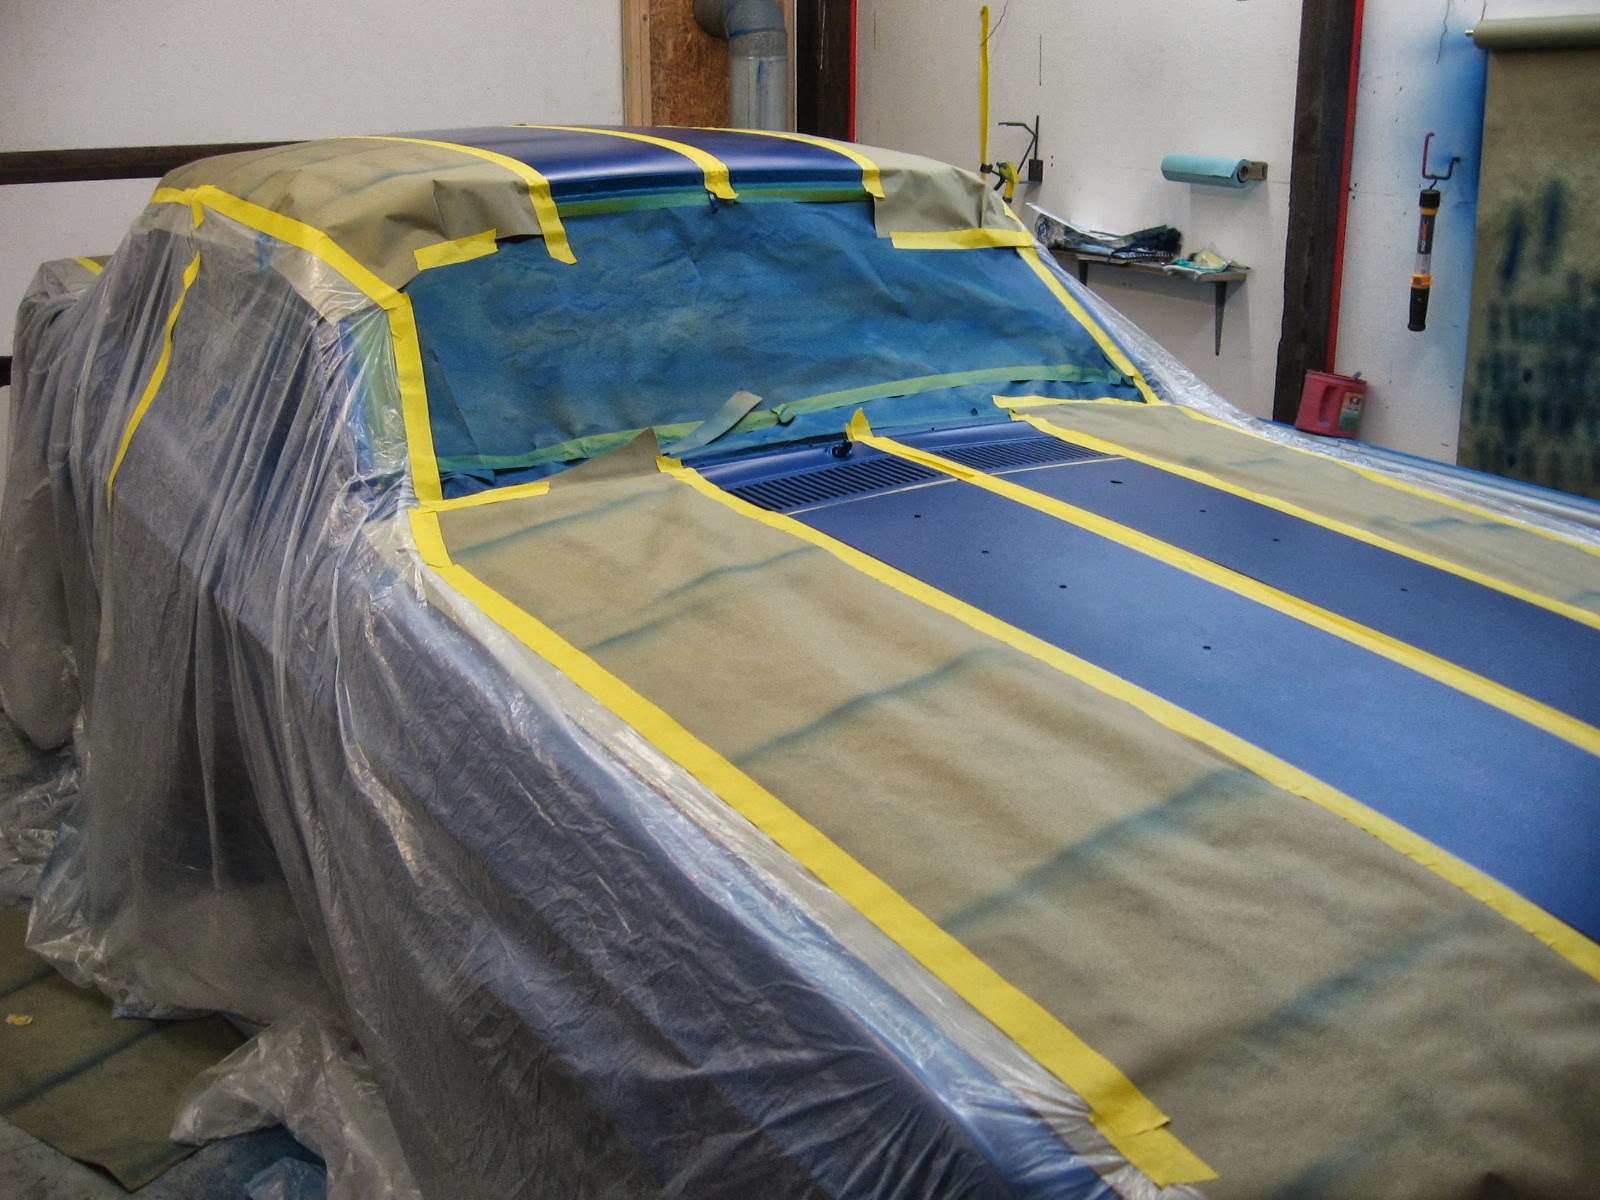 |
| The rest of the car is then masked off. |
 |
| The valances are the hardest to mask off with all their contours, while the roof and hood are easy and fast. |
 |
| The stripe color is sprayed. |

 |
| 30 minutes after the last coat of white, the masking and tape can be carefully removed. |

 |
| The fine line tape leaves laser crisp edges. |
 |
| There were several masking breaches where the white managed to go beyond its boundaries. All these problems with breached white here were remedied by very carefully removing with 1500 wet. This provided little to no disturbance of the base or metallic. |
This comment has been removed by the author.
ReplyDeleteLooks awesome Josh. Can't wait to see it finished.
ReplyDelete