I made good work of everything detailed in this entry, completing it all in three days after manning up and taking the heat in the shop for long days. In an
earlier entry I wrote about replacing a quarter skin. The repair went well except for major warpage I encountered along the weld, and it was due to a new method I was trying. Countless (or so it seemed) hours of on-dolly hammering to stretch was to no avail but with the warpage as pronounced as it was, there was absolutely no way it would be able to stay in this form if I wanted a straight side.
The Problem
The problem was due to how I made the welds. I would make single spaced out tacks and let it cool naturally. However, for the next round of tacks, I then placed the next tack directly next to the old one rather than splitting the difference between two old tacks (this latter method is how I've done all my welds up to this time). This new method is pictured in the original entry I linked above. It made a nice pretty weld but really affected the way the metal was pulled with each new tack.
The Fix
By cutting the weld back open, I should be able to relax the metal and do some additional stretching. Then reweld back shut, but splitting the difference in distance between tacks rather than laying the new tack next to the old as I did before. Second, constantly stretching the weld area after each round of tacks should help me keep ahead of any extreme shrinkage and distortion.
 |
| I first experimented with making a ~6 inch opening of the old weld. I found it works best to open longer sections at a time because weird stuff happens at each end of the cut. |
 |
| Putting the welds back in show the best way to tack it back shut, splitting the distance between welds, as opposed to spacing tack welds out initially, then putting all new tacks next to the original tacks instead of between them. |
 |
| The fix was a great success and the horrible warpage I had before is now gone. The difference between the side of the panel is night and day. It's puckered in giving me room to fill. This will be a nice panel to work now. |
 |
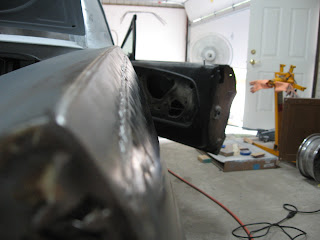
| While I was at it, I had this original corner bracket in the rear. It was bugging me because it was all chewed up and didn't look good. I had an extra new one so I decided to just replace it. |
 |
| So I cut the old one out, carefully removing the spot welds... |
 |
| And got the new one welded in place. |
 |
| After grinding down the welds and cleaning it up, this is the final repair. |
 |
| I prepped the panel and shot it with SPI epoxy. I prefer to do my filler work over epoxy for maximum corrosion protection. Filler work will begin the next day... |


No comments:
Post a Comment