Thursday, November 28, 2013

New product review: Mastercoat Metal Prep

Some time ago, I was sent a goodie bag of refinishing chemicals to evaluate and play with.  One of them grabbed my attention in particular and has made itself a frequently referred to, permanent fixture in my shop. 

It is a phosphoric acid-based metal prep distributed by Mastercoat.  Much like Ospho only better, Metal Prep also contains a detergent for cleansing action of your dirty parts as well as a higher concentration of phosphoric acid.  Oh, and it's REUSABLE.  Its presentation is a yellow liquid and it is pretty potent stuff.  It has a sweet smell and some noxious fumes associated with it.  Personal protective equipment should involve safety glasses, gloves, and a respirator, which are standard fixtures in my shop.  Before I continue, I should include the disclaimer of always follow the tech sheet of any products you are using, including the metal prep, and especially other products that may be used in conjunction with phosphoric-acid containing metal preps.

This is especially great for cleaning up rusty bolts, nuts, clips, etc, to like-new condition in as fast as an hour.  I keep a small Gladware container in the shop with a few inches of depth of the Metal Prep.  When I need to clean up some bolts I just toss them in there and check on them in 30 minutes to an hour, if not sooner. 
Here I have some rusty clips soaking.

This is a 'before' and 'after' with a comparative sample.  The clip will go from rusty and grimy on the left to clean and like-new in under an hour.

These are the same rusty clips shown soaking above.  They now look new, and are nicely prepped for Parkerizing.

But this also has other ways I put it to use to besides soaking small parts.  It's especially useful for removing heavy rust in hard to get areas, especially where you couldn't fit a sander or a blaster.  For instance, on the inside of this door:
This was the inside of the driver's side door skin.

I wiped the area down liberally with the Metal Prep, then laid out SATURATED paper shop towels, smoothing them out as much as possible to make full contact.  I occasionally continued to add more solution to keep the towels wet.

After sitting overnight, I peeled the towels off the next day and the majority of the rust was gone.  The remaining rust you see was black from the chemical conversion process that occurs with iron oxide and phosphoric acid.  The paper towels were quite difficult to peel off the next day as they had mostly dried and then stuck to the metal.  After it was completely dried, I brushed on two coats of the Mastercoat Silver permanent rust sealer.


Saturday, October 19, 2013

Paint part III: Spraying clear coat

The last part of a paint job, if doing a basecoat/clearcoat system, is spraying the clear coat.  This is what separates the boys from the men, where the car comes out looking like a show car or a dud.  For the task, I used SPI's Universal Clear, a high solids show-caliber clear, and probably one of the best for the purpose one can get.

The clear should go on the base very soon, usually within 24 hr or whatever the tech sheet states.  Alternatively one could use an intercoat clear, which goes on over the basecoat, and then is scuffed when the clear coat is ready to be applied.  However, there is one secret even the paint reps won't tell you (they're actually instructed not to tell), and that is--as long as the car is not removed from the booth so the base is exposed to UV and contaminants--SOME bases can sit indefinitely before the clear goes on, but it all comes down to the polyall used in the base.  I really exploited this as my car sat in base for several weeks.  I'm writing this here for my own archival purposes...for anyone else, just pretend you didn't read that last part.   Thinking of using that cheap, economy line base coat?  Situations like this is where you'd run into problems.

I sprayed about a gallon and a quart kit of clear on the entire car, over 3 coats.  This came to 2.5 sprayed gallons.  I was using slow to medium activator for the clear, which is mixed 1:1.  I had ordered the slow as I was thinking I would be doing the clear in much warmer weather, however the slow is still ideal for most temp ranges.  If faced with two different speeds of an activator or reducer to use in the same job, always spray the fastest one first.  The temp when spraying was in the 60's, letting 30 minutes of flash between coats.

I used an LPH400 with silver cap to spray, gun settings were 28 psi, fluid backed out 2.25 turns, and fan about 90%.  I mixed up 1.5 quarts at time to spray (not all of it is poured into the gun at once) so I could spray almost continually without having to stop to fill up more.  The decklid was removed and set aside so I could clear the trunk jam; the decklid will be cleared later.  The headlight buckets had also been removed so I could get better coverage on them with base, and they will be cleared separately also.

The adage goes spray it how you want it to look.  Well I wanted the car to look really wet.  I was also afraid of dry spray so was more willing to push it to a run in order to assure it wasn't dry enough.  These are called 'flow meters.'  Well my flow was working very well, and I got some pretty horrific runs on the passenger's door right under the top C body line, which will be a devil to run out.  It was technique that created this run as I went over it too many times trying to get coverage.  I'll have to deal with these when the time comes.  I had runs in other places too, but every painter gets runs, in fact the pro's expect at least several.  They are a lot easier to fix than dry spray.  With that being said, I do have some areas that also went on dry, or that I almost missed altogether, such as front and center of the hood.  I may have to reclear the hood. 

One other thing...the car should be tacked off very well several times before spraying clear, but never after the first coat goes on.  Now onto the pics.


Friday, October 18, 2013

Paint part II: Painting LeMans stripes, aka 'racing' stripes

The second part of this painting process involved painting white LeMans stripes (commonly referred to as 'racing stripes.'  The stripes were painted with SPI white basecoat.

Measuring, taping, and masking off the stripes can be an epic task just in itself.  The stripes are not a uniform width all the way back, but tapered.  The Shelby LeMans stripes specs and dimensions can be found here.

My stripes ran from the lowest front point of the car completely over the top to the lowest rear point of the car, so valance to valance.

Essential tools are 3M fineline tape (creates super sharp edge), regular automotive grade masking tape, 1.5 inches, masking paper, and masking plastic.

The distance between the two stripes is 2 inches.  I cut strips of masking paper at the distances I need, and had a mark in the center.  I used the center mark to align with a center pointed marked on the car panel, and then put a mark at each end of the masking 'tape'.  I made my markings with a pencil.  I only made my marks at the very front and rear, or top and bottom, of the panel.  If the fineline tape is started so it starts at one mark, you can pull it in a tight straight line to line up with the second mark.  On most of the panels there is a 'landmark' on the panel that is located exactly in the center, such as the gas cap, or license plate bracket for instance, or maybe a little screw for the window moulding trim, to help find the center.  Care has to be taken in getting the fine line tape to adhere and stick tightly in tight corners.  If it lifts the paint will creep under.  Here's the thing: once the tape goes on the car, you should plan to finish the job and have it back off that same day.  Never leave tape sitting on fresh base for extended periods of time.

Once the stripes are taped off with fine line, I taped off the center with masking tape.  I also ran masking tape along the outer lines, and tape down 18 inch masking paper along the entire length of the lines on every panel.  Then, painters plastic was taped to near the outside edges of the masking paper.  Be sure to seal the grates of the cowl that are to remain body color well with tape.  Otherwise the paint overspray will go down through the cowl grates and come up under your masking.

The striped areas are tacked off well.  I first spray a light to medium coat of paint along the tape edges and let it sit for 20 min.  This builds a bridge at the tape edges and prevents solvent creep.  I then came back and sprayed 2-3 medium coats in the striped areas.  After letting the white flash for 1 hr after the final coat, the tape is carefully pulled off.  Slowly pull the tape off at a 45 degree angle away from the fresh tape.  It was at this point where I marveled at how amazing the car looks.

It is inevitable that the tape will lift in some tight corners and the stripe color will creep through...mine did in several places.  The fix for this is easy and fast.  It can easily be sanded away with wet 1500 grit sandpaper.  Just sand gently enough to scuff only the undesired paint away. This job took me a nonstop 12.5 hrs, from measuring and masking to pulling off the masking.

The stripes are first taped off with fine line tape.

The rest of the car is then masked off.

The valances are the hardest to mask off with all their contours, while the roof and hood are easy and fast.

The stripe color is sprayed.


30 minutes after the last coat of white, the masking and tape can be carefully removed.


The fine line tape leaves laser crisp edges.

There were several masking breaches where the white managed to go beyond its boundaries.  All these problems with breached white here were remedied by very carefully removing with 1500 wet.  This provided little to no disturbance of the base or metallic.

Thursday, October 17, 2013

Paint, part 1: painting base coat

I'm WAY behind in getting this updated, as the car sits in the shop FULLY painted now, and for such a major milestone I have not said a thing about it.  So while I sit in a Delta Sky Lounge--alone and bored on a Wednesday night--waiting for my flight to France, I still have my laptop and free wifi; what not a better thing to do than update my blog.

The base I'm using is ProSpray, I order it from Chad at AutoRod technologies and he's good to deal with.  He ships, so if he's not near you, no problem.  I have mine shipped in.  The color is Viper GTS Blue, of 97 Dodge Viper notoriety, paint code PBE.  It is a beautiful, transluscent blue with metallic that glistens, and when cleared you can look into it about a mile.  It is probably one of the most beautiful car colors you'll see, and for sure one of the most beautiful blues you'll come across.  Because it is transluscent, coverage and hide is very poor, I have 4-5 coats on this, maybe even six on some parts, by the time it was all said and done.  All in all, I sprayed nearly 7 quarts (14 sprayable quarts when reduced 1:1) at a cost of $89/quart.  I used SPI slow urethane reducer, and added SPI universal clear activator (slow) at 1 ounce per mixed quart.

Starting out spraying the base I had issues almost immediately.  My Finishline wasn't giving me a good pattern try as I might to adjust it in.  I was getting a lot of moisture through  my line even though I had a two-part filter: water/oil filter and dessicant.  I was getting fish eyes and actual water spots all over the car in the base...water spots that looked like hard water had actually dried on the primer and then was sprayed over with the blue.  And I was putting the base on way too heavy and ran it in several spots, which meant I had to sand those spots down, which they then turn white and become very difficult to cover.  Finally, I had bad tiger striping on all the horizontal surfaces.  I will address how I fixed each of these.

My Finishline problem was solved when a friend sent me his Iwata LPH400 with purple cap for metallics and silver cap for clear.  Only the purple cap was plugged up so I had to use the silver cap for both base and clear, which it still worked just fine for the metallic base.

To fix the moisture, I bought a DeVilbiss Desiccant snake, which I ended up not  being able to use as it cut down my pressure too much.  I also put a 20' length of coiled 1/2" copper tubing between my compressor and air filters to help cool the air  before entering the booth.  And my desiccant was far too small of an amount to be efficient for the entire car, so I had to constantly be changing it out and drying it in a toaster oven at 250 degrees F until it turned blue again.  I had recharged desiccant going while I was drying the 'used' desiccant.

To remedy the water spots, I wet sanded the entire car with 1500, then sprayed another 2-3 coats over the entire car.

I had some crunchy base right in the middle of the roof where I didn't reach in good enough and fixed this with 1500 wet as well.  The base should go on medium wet--not so wet that it runs or dries shiny, but also not so dry that it looks dry or is crunchy.  However, even crunchy base will still look as good as everything else under clear.  If I was ever unsure about the base consistency, I sprayed it until it was real wet with SOLVENT based wax and grease remover; this simulates clear coat almost perfectly.  If it looks good with this, it will look great with clear.  Then immediately wipe the wax and grease remover off.

TO FIX TIGER STRIPES--and this is an amazing fix--I sprayed a medium wet coat in a direction perpendicular or at an angle to the existing striping.  Immediately after spraying the panel, WHILE THE BASE IS STILL WET, I increased the pressure 5 psi, held the gun 12 inches from the panel and sprayed a fast drop coat over the entire panel in one direction, then sprayed a second drop coat over the panel in a different direction.  It is important to do this while the base is still wet so the drop coat can melt into it.  Otherwise, the drop coat will go on dry and will not adhere, which means your clear will not adhere and might peel off in sheets.  Do this and the stripes will be GONE.  Don't worry if it looks dull and not shiny, that's what the clear is for!  Ideally the car should look satin.

I sprayed the car at ~ 25 psi, 90% fan, with the fluid 2.5 to 2.75 turns open, holding gun at 5-6 inches, with the Iwata LPH400 and silver cap.

Here's an example of what bad tiger stripes would look like.

Some paint dripped from the lid of my gun and fell onto the surface of the hood.  I learned you should not try to wipe it away or this happens.  This made a little crater.  Instead, let it dry, wet sand down with 600, then spray over the area again.

quarter panel in base

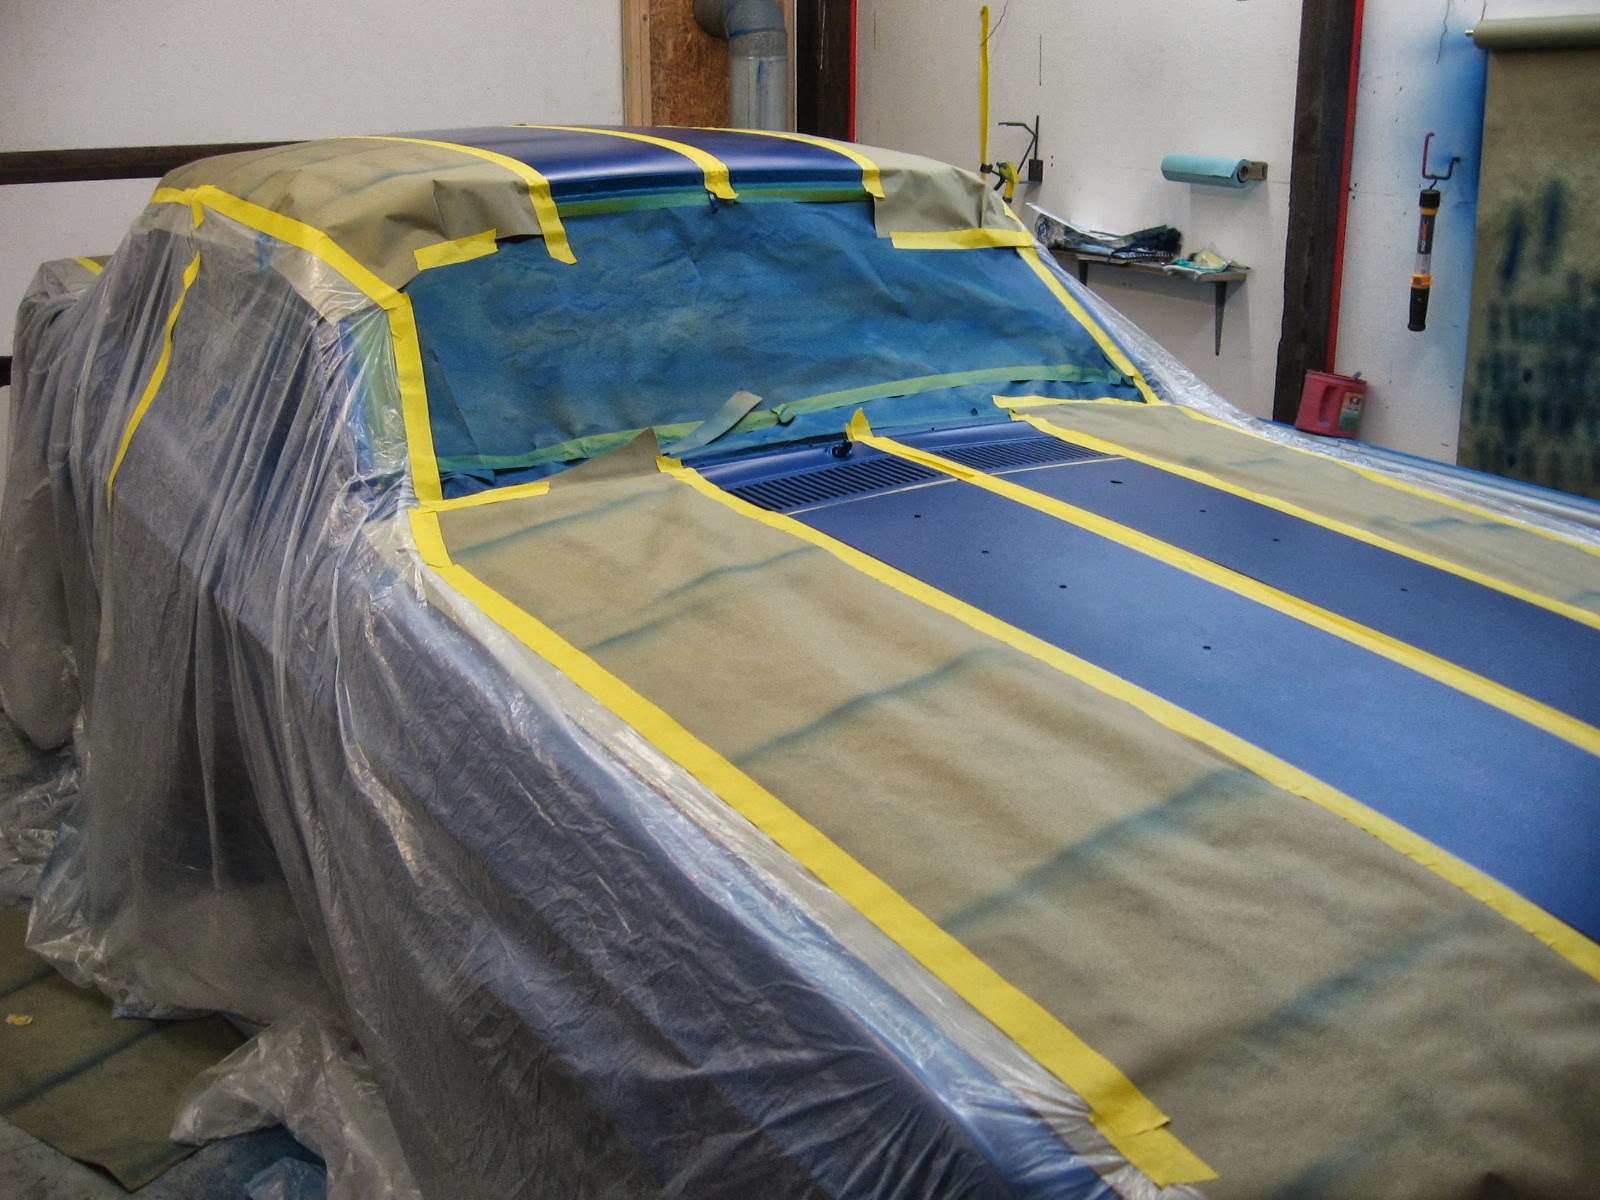
This is the car sitting in its final base.  You can see how effectively the hood was remedied just by another medium coat and some drop coats.

Sunday, September 15, 2013

Final assembly and masking, and new wheels!

I picked up a set of used 14" Cragar Super Sports from a guy on Craigslist for $250, with tires.  The tires are shot, but the rims are still in really nice condition.  I am going to stick with 14" rims because that's what these are, though I was originally going to get 15" if buying new, for no reason other than it's a popular size.  With 14" wheels however, I have realized several things:

  • wheel well clearance is not an issue, even with wider tires (these wheels came with 245/60's on the back, and 195's up front).
  • The extra space around the tires and wheel well lip give the car more of a muscle car stance because it looks raised rather than squatted (opinions will differ).  I'm very much not a fan of the 17" wheel look where the entire opening is filled up with wheel and tire.  It looks like a hot wheels car.
  • I don't have to change out my speedometer gear.
So here it is, what a difference new wheels make:


I've included this picture as a reference to see the difference without the wheels.  This is the other side of the car.

 Final Assembly and Masking
I did the final assembly of the rest of the car in preparation to paint the outside in its entirety.  I don't tighten bolt-on parts such as fender and quarter extensions or valances down tightly because I want there to be a gap.  This prevents paint from bridging the panels.  Eventually that paint will crack and will look unsightly.  After the painting is finished, I'll tighten everything up.   Because I had done a test fit prior to this, I knew everything would fit perfectly and I knew where my problem areas were going to be, I knew how to adjust to fix them, and where to shim.  I probably had close to 15-20 hr in the final assembly and getting all the gaps right.  It was during this time I wet sanded the entire car with 600 grit as the final sanding step before a metallic basecoat.

I'm using these rubber washers underneath the fender bolts so they don't scratch the fenders up.  It seemed like a good idea, but I guess I'll figure out really quickly if it was only good intentions.

In its final assembly

Masking
After assembly was complete, I drove the car into the booth, put it up high on jack stands to give me easier access to bottoms of panels when painting, and took the tires off.    I am using 1.5" 3M yellow.  I had used 3M green before, but it's hard to rip and is really sticky.  The 3M yellow corners nicely, tears pretty well, and isn't notoriously sticky, yet it still sticks very well.  I have also heard lots of good things about American Tape, but did not have a distributor nearby.  I could have picked it up on Ebay.

Some cars you see masked up look like a beautiful work of art.  I will probably never fall into that category, I want to be practical, functional, but not use 5 miles of tape either if it's unnecessary.  I do care about not leaving a tape edge, so I do lots of back masking.  Back masking provides for a rounded edge, rather than a hard edge, so there's a transition of paint and you can't tell it was ever masked.  I'll explain in the captions.

I'm doing this rather unconventionally, but I need to spray the trunk lid on the car since it's metallic, or at least spray it at the same time with the same gun settings as I do everything else.  But I don't want to remove it because I'll need to tape off the stripes as well and it needs to be perfectly in place for that, which it currently is.  But I also need to paint the trunk jambs.  The back edge of the trunk lid hangs over the tail light panel and obscures some of the tail light panel so the only way to get thorough coverage would be to paint with the trunk lid off, hence not painting the jambs separately.  Since I did not want to remove the trunk lid, I masked off the underside so I can spray it raised.

I back-masked the underside so I didn't get a hard tape line.  To do this I ran the tape along the edge of the underside of the trunk lid with about an inch of it sticking out.  The sticky side would have been pointing up in this picture.  Then I fold the 1" of tape that was sticking out down 180 degrees, so the sticky side would now be facing down in this picture, and would now have been folded underneath the trunk lid.  Don't crease it, keep it as round and bubbly as possible.  The masking paper then sticks to this once it's been folded under.

Back masking doors and hood is similar.  I taped the jambs with about 1/2-1" of tape sticking out, then carefully folded it back on itself about 90 degrees.  Then just simply shut the door or hood.  The tape will make a round bubble out the gaps and will prevent a tape line forming on the edges.

The car all masked and ready to go.  I tried an experiment with cardboard in the windshield but it didn't work well, so I just stuck to my masking paper for everything else.   A skirt is masked all the way around the bottom of the car.  The wheel wells are masked off, as well as the radiator opening and openings in the valances.  I also masked off areas behind any holes or openings, such as the quarter panel openings, door handle/door lock, gas cap hole, etc.

Installing the rocker nut for the fender-to-rocker bolt

I've seen the question come over forums time and time again, 'how do you install the fender bolt nut in the rocker?'

I was first stumped when I first had to do this, but it's very easy, and literally takes about, say, 5 seconds.  Seriously, when you see this you will say 'DUH! That's so simple!'....even though you just got done fighting it for 30 minutes. 

The nut has two little ears, or tabs, on each side that rest against the bottom of the rocker, on the outside of the rocker.  This is so you can push up against it and it won't go up into the rocker.  If your ears are busted off, don't even try to fight it, just order a new one.

The nut is going to go into the hole in the bottom of the rocker in this orientation.  One side is 'longer,' because the ears are closer to one end.

Put the 'longer' end into the hole first, at an angle.

This is just another view.

Once it's in, then you push it up so it's flush, then kind of slide it back toward you with our finger and the nut will drop into place.  Pay no mind to my dust trails from wet sanding.

Monday, September 2, 2013

Installing weatherstripping

It's been a few weeks now, but I installed the weatherstripping on the trunk lid and doors.  There are a few tricks to it that don't seem immediately obvious as first.

I used Carpenter Reproductions weather stripping that I ordered from CJ's.  My panels were off the car laying upside down when I installed.  I did a test first first, just a mock up to make sure the stripping was going to be the correct length.

The weather stripping has a mold releasing agent on it that can make it so it doesn't adhere to the adhesive well, so first clean the weatherstripping with wax and grease remover.  I've read that some people have had to scuff their weatherstripping with a red scotch brite to make it adhere better too.  Then scuff the surface on the car that the weatherstripping will be adhering to with a red scotchbrite, and clean the surface with wax and grease remover and let it flash off.

I used 3M Super Black Weatherstripping Adhesive, applying a light coat to the panel as well as the mounting surfaces of the weatherstripping and letting it set up for a few minutes  until it was tacky before setting the weatherstripping on the panel, working in sections a few feet long at a time.

A tip I discovered...the adhesive is like black rubber cement, it will be stringy and get on the panel, and it will squish out and get on the panel.  This can easily be removed by the sticky side of some masking tape...it just pulls it right off, providing the adhesive isn't fully set up and cured.

Some areas of the stripping, especially the corners, I had to tape down to hold it in place to make a good seal.  I let it cure overnight at least before messing with any of the panels or trying to mount.

One word of caution, be prepared for your doors to not close well or all the way initially.  Eventually the stripping will soften and collapse a bit, but in the meantime, I have raised the latch on the trunk and will lower it over time as the weatherstripping settles.  The doors take some effort to close, but I've been keeping them close to train the weatherstripping as well.

I have tape holding down the weatherstripping on the trunk lid.  The weatherstripping should butt together at the striker location.  Sitting looking at my trunk lid upside down and backwards, I realized after the fact that I made my butt joint at the front center of the trunk, thinking it was the back.  Oops, but not a big deal.  At least it won't be real visible this way.

Trunk weatherstripping is completed.


This weatherstripping fit well.  The top is both adhered and secured into plate with a small screw.

Thursday, August 29, 2013

Painting on-car jambs

I had myself another jamb session...several weeks ago now actually, but just now getting around to updating.

The entire car got rolled into the booth, and I painted the door jambs on the car, the inside of the trunk, and the cowl jamb.  When I painted the jambs on the panels I did not mask and just let the overspray go on the rest of the panel.  If you go this route, be sure to sand or scuff the parts of the panel expected to be hit with overspray so there will actually be overspray adhesion.  When the rest of the panel is wet sanded down later, the overspray will be smoothed and leveled but not completely removed, so you will be counting on its adhesion so everything above it does not lift off as well.

On this round, I wanted to see if I liked masking the adjacent panels off better.  The best way to accomplish this is to back mask where the mask is taped down and folded back over itself so as to create a transition and now a hard tape line.  To accomplish this on the cowl for instance, one would lay their mask over the engine bay area and tape it to the cowl.  Now gently fold the mask over the cowl exposing the cowl jamb to spray.  When making the fold take care so as not to make a crease...you want a smooth transition.

Anyways, I put down two coats of base and two coats of clear.  I actually got some runs in the base so I had to sand them down wet with 600, and shoot two more coats.  After the base had set up for at least an hour, I measured off the stripes in the cowl jamb, taped them off and sprayed the white.  I'll talk more specifically about spraying stripes later.  After letting the base set up for at least 3 hours, I sprayed the two coats of clear.
The entire car got a final seal coat of lightly reduced epoxy.  This sprayed on as smooth as glass.

All the jambs are based and the cowl stripes are taped off.

Cowl jamb after 2 coats of clear.

Door jambs with base and clear.

Up close on the cowl jamb...very little to no orange peel in the clear.  I am not planning on cutting and buffing the jambs so had to take care in setting up gun adjustments and controlling my distance from the panel and stroke.