Saturday, October 1, 2011

Replacing a quarter skin

It is the end of September...almost October, and the last post I made was in June.  This was partly do to procrastinating my updates here, mostly due to being really busy with in depth body work so there wasn't a lot to say, and again partly because I relocated to Kalamazoo, MI in the beginning of Sept to work for Pfizer Animal Health.


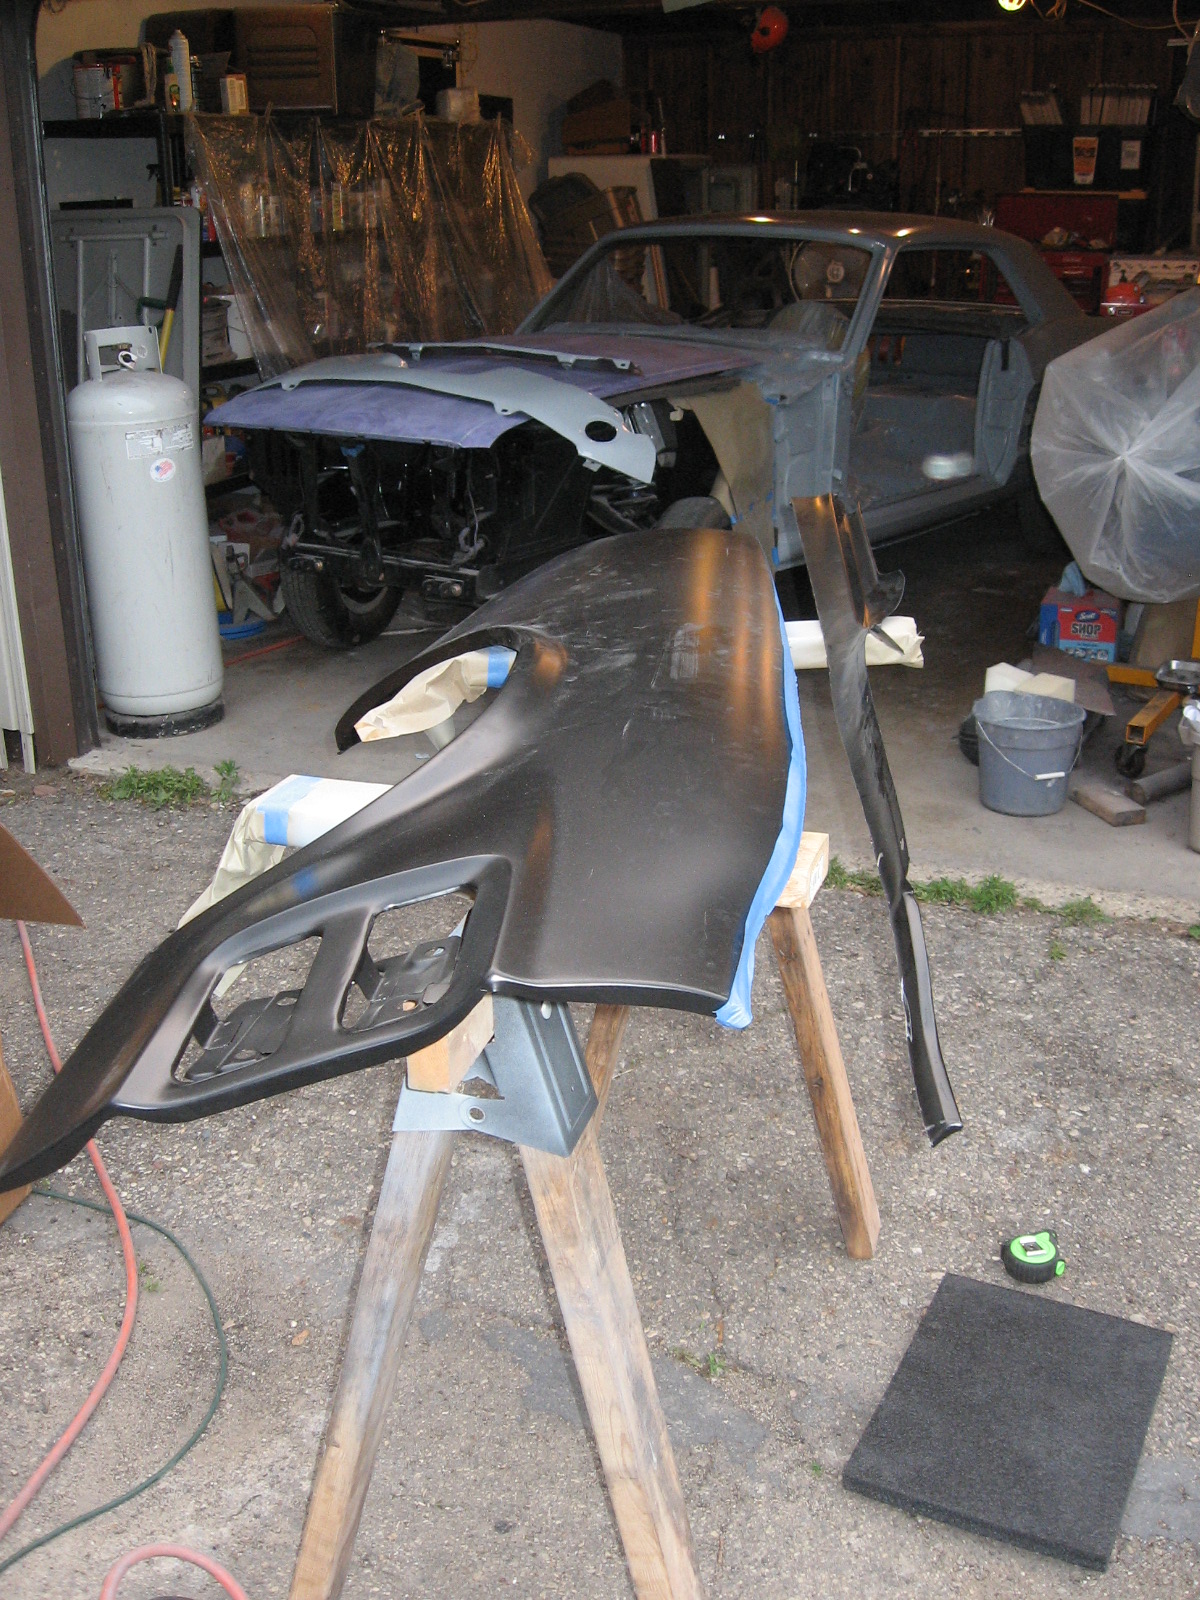
In sanding down the passenger's side quarter panel I came across more bad news.  Excessive filler and body damage meant this quarter was going to need to be replaced too.
This filler was best removed with an air chisel because it was that thick.  There was also shrapnel in it.  This part of the car was hit and completely dented in.  Instead of pulling it out all they way, the body line was reshaped with excessive amounts of filler.
The wheel house and quarter was flattened here and lost its contour.  It was reshaped with a half inch of filler.

Not wanting to go through the nightmare of replacing a full quarter this time, I opted to only replace a quarter skin.  All spot welds along the lip of the wheelhouse, along the bottom of the drop downs, above the rocker, inside the door jamb, and on the back where the quarter meets the tail light panel were ground away with a cut off wheel or a spot weld cutter, taking care to leave the mating surface perfectly intact.

Two strips of painters tape were then striped down the side following the body line to give me a cutting guide 2" beneath the body line.  Once the cut was made, the quarter skin was easily removed.
The damage to the rear of the quarter is apparent in this picture.  My cutting line was masked off with tape.

I cut along the line with a cut off wheel and popped the quarter skin off.

The inside metal was then stripped with a wire wheel, degreased, primed with etching primer, and painted with chassis saver.  Paint will be removed from surfaces where welds will go.    

Now for all those of you considering replacing a quarter skin, LISTEN UP.  I ordered a quarter skin from CJ Pony Parts.  It was backordered and took awhile to get here.  Once I got it, I noticed a large crease beneath the body line along the drop down at the rear.  It almost looked like a second body line, but I was sure it was damage.  I reported the problem to CJ's and they happily sent me a new skin and arranged for FedEx to pick up the old skin at no cost to me.  Upon arrival of the new skin I noticed the exact same line.  I now realized it's how the skins were manufactured and the first one I had was not damaged at all.  If I did not like it I was going to have to work it out by hand.

The test fit of the skin was a nightmare.  The skin was almost 1/2" too long and the skin was nowhere close to even matching up with the drop down behind the tire.  It was so bad I actually laughed out loud to myself when I was trying to fit it.  Not only this, but the back of the skin is not stamped where the rear valance should fit in.  There was no way in the world this skin was ever going to work without serious cutting and rewelding.  Oddly enough, the wheel well radius of the skin and wheel house was a near perfect match. So I scrapped that $80 skin and ordered a full quarter from CJ.

If you are replacing a skin, my advice from this point forward is always going to buy a full quarter and cut it down to a skin.  The full quarters are manufactured better with thicker metal, and they are a more accurate reproduction.  In general they are just built better and fit better.  I took my full quarter, drilled out the spot welds in the rear, and cut the entire panel one inch below the body line.
To make a skin out of a full quarter, the end of the panel here was removed.

I taped off the top of the panel and cut along the body line.

The next steps were a matter of fitting the new panel.  Upon initial test fit, everything lined up very well and I was feeling much better in my decision to modify a full panel, even if it did cost me another $300+.  I probably saved that much in glass since no tools were thrown through windows.


Because there had been an impact on the outside of the wheel well, it was dented in badly and the wheel house was pushed in about an inch and would not make contact with the quarter wheel well.

I traced a black line along the edge of the quarter wheel well on the lip of the outer wheel house.  The edge of the lip to the black line is how far out the wheel house needs to be pulled out.


I tried to push the wheel house out as much as possible with a Porta-power but this was difficult.  What ended up working the best was cutting three slits so I could pull the sections out farther to where they needed to be.  The slits will have to be welded closed from the inside once the quarter is installed.

The panel was then mounted and screwed into place.  The top was also screwed about every 15".

Welding
Because I want to 'do it right,' I'll be butt welding the new panel to the old panel, eliminating the need to have an overlap.  I've heard this is very difficult to do, but given my success in replacing the sail panel, I felt I was up to it as I've become very confident in my welding skillz. 

 I cut right along the top of the new panel, using it as a guide to finish cutting the old panel since I had intentionally left excess.  A cut off wheel works best for this. Cutting right along the new panel resulted in a perfect match of the new panel to the old panel.  The strip of excess that falls off the old panel is then pulled out from the inside.
  I installed panel clamps to hold the panels flush so I can start tack welding.

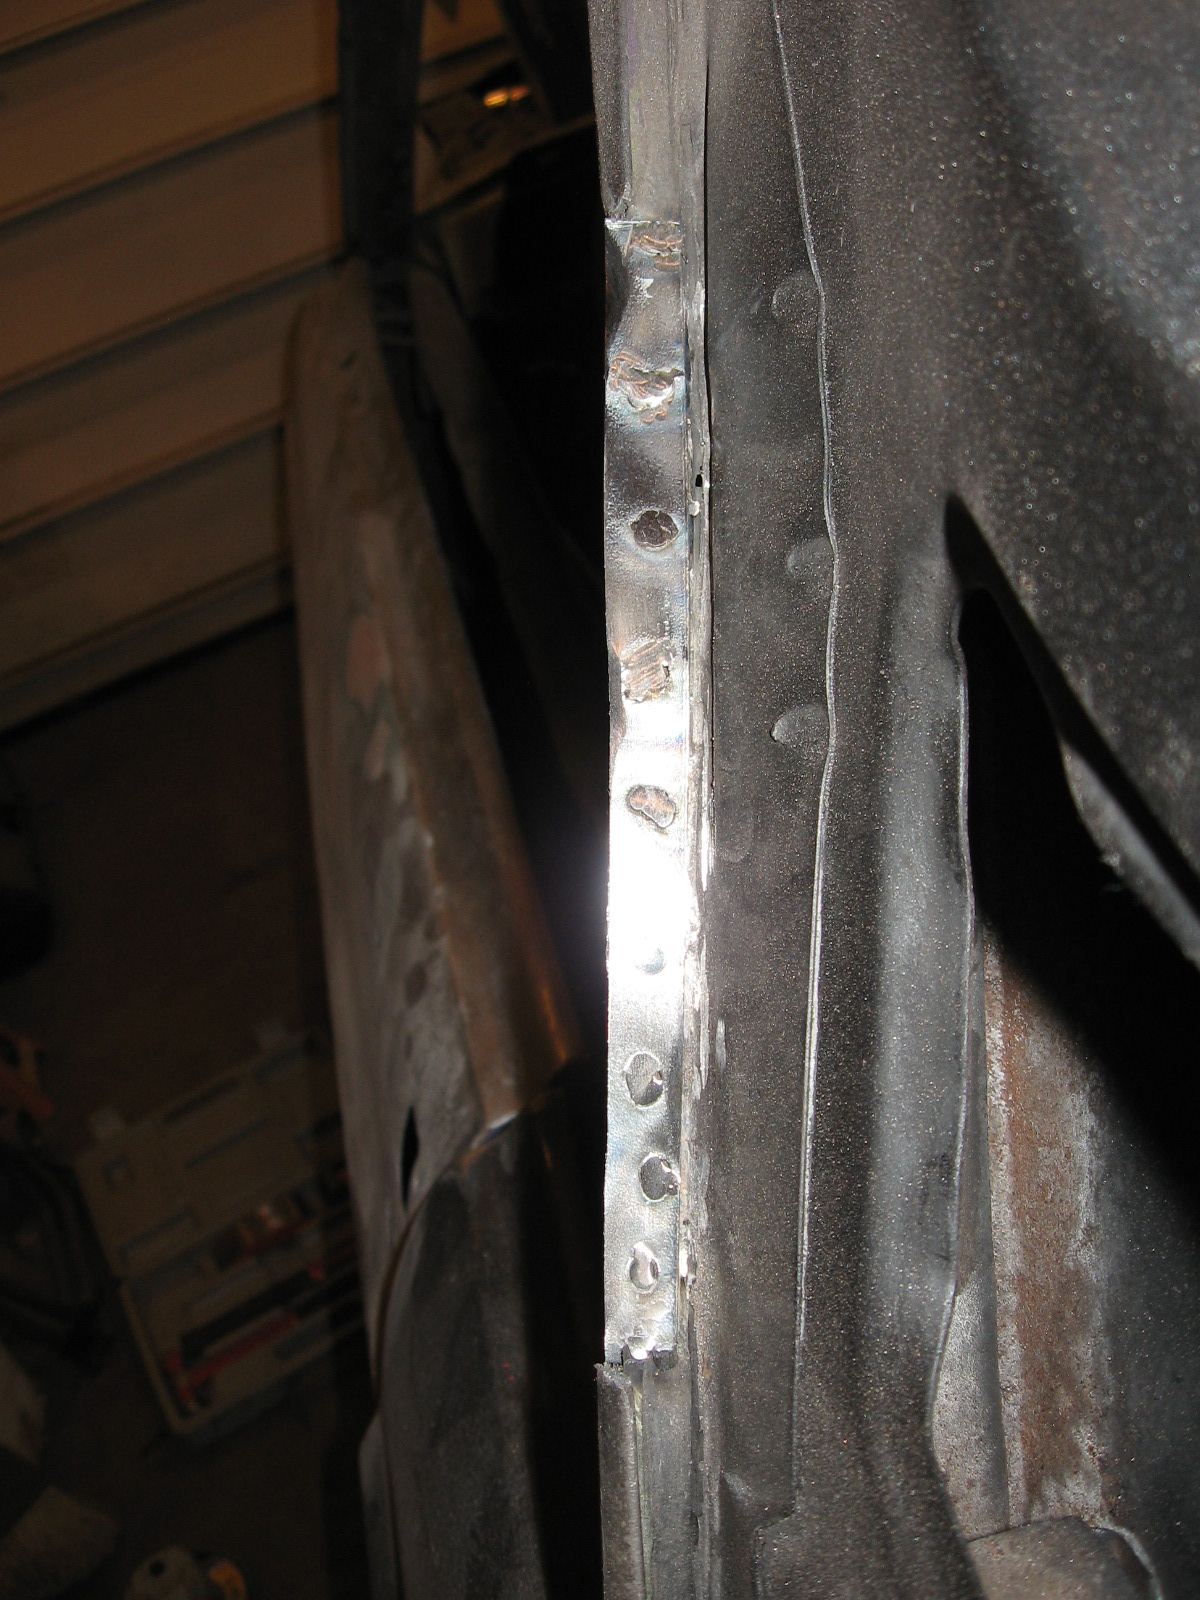
I made a series of tack welds about every 8 inches with my Eastwood 110V Mig welder (which is a fantastic piece of equipment and I highly recommend, by the way).  After the welds have cooled, I come back and make a new tack next to the old one, and continue this slow process until I have a fully welded panel.


Finally, after several days of welding, the welds are complete and the quarter panel is completely installed.


Unfortunately, try as I might, I still ended up getting some very bad warpage even though I precariously took deliberate measures to avoid it.  I'll have to stretch this metal with on-dolly hammering.

 Before I mounted the quarter for the final time, I had punched or drilled holes along the door jambs, wheel well, and rear flange so I could make plug welds in them.  The quarter will be welded to the rocker by tack welds made from the inside.

My repairs to the wheel house made it line up perfectly with the wheel opening in the quarter panel.  Then I made my plug welds.

I had also punched holes along the drop down to make plug welds here.

...and made my plug welds in the door jamb.

And the completed project.  If you're a hippy, you'll see orbs in this picture.  If you're normal like me, you just see light reflections from suspended dust in the air.
I grind down the welds using a combination of an angle grinder and a cut off wheel.  You have to be careful and not dwell in the same spot too long to avoid heating the metal up too much and warping it.

All in all, it came out very good and my old body teacher Kirk was highly impressed, and then was even more impressed when he realized I butt-welded the entire thing. I still wasn't without some nasty, nasty warpage that was quite discouraging, but I guess that's another day's project.


Tuesday, June 7, 2011

Prime time

I used a Saturday during Memorial Day weekend and then took the the following Tuesday and Wednesday off from work to get some SPI Epoxy on the car. The entire project was broken up into three segments: on the Saturday I shot the interior and inside trunk; Tuesday I shot the exterior, and Wednesday I shot bolt on sheet metal and pot metal parts such as quarter panel extensions and head light buckets.

This is all about preparation. To demonstrate the extent of preparation, each of the 3 days shooting primer were 8-9 hour days. Of this 8-9 hours, only 10-20 minutes of each day was spent with the trigger actually pulled. So that means there was 7 hrs and 40 minutes of straight last minute preparation, and 20 minutes or less of spraying paint. The final prep steps include doing any last minute sanding, scuffing, or removing small spots of flash rust. And finally (and most important) degreasing, and more degreasing, and then more degreasing. At bare minimum I degrease all surfaces to receive primer twice. The wax and grease remover should be sprayed on and immediately wiped off. Wiping it off is necessary to remove the contaminants lifted off the surface of the metal. If not wiped off, the contaminants will remain on the metal. Note lacquer thinner should not be used as a degreaser because it does not lift contaminants like wax and grease remover does, thus leaving a residue on the surface of the metal consisting of contaminants. For the final degreasing, I wipe the surface with a shop towel with degreaser on it, then wipe again with a clean dry shop towel. And now for the good stuff...


Tuesday, May 24, 2011

Replacing B Pillar skin

One of the latest chronicles in my Mustang adventure has been to replace a badly dented/damaged B pillar or sail panel, whichever you prefer to call it. The damage was hidden by 1/2-3/4" filler. When it was removed it revealed a panel that could be used as landscaping for a model train set mountain range. After going around and around with a variety of fixes, I finally opted to replace the panel skin.


We start by showing the damaged B pillar on this 67 coupe. You can see I was quite literal in my model rail road mountain range description.


This is one of the few body panels that you cannot get reproduction. I called up CJ Pony parts and had them send me a replacement B pillar from a donor car in their salvage yard. I was just expecting the panel itself, but as you can see from what they sent me, they weren't messing around. That chunk of car was $175 shipped.


I removed the paint with a wire wheel on an angle grinder. There were a few small spots of some deep set rust so I spot blasted these with a panel blaster using aluminum oxide media. The leader filler along the quarter panel seam is melted off onto some foil using a propane torch. After studying the panel carefully, I plan where to make the cuts and exactly what part of the panel I'm going to remove and transfer. I mask off where the cuts are going to be with tape. I will be going about an inch below the body line, and for two reasons: the metal is somewhat reinforced here since it's near the body line, and the body line provides and easy point of reference. I will be cutting the bottom just above the seam where the quarter panel butts in under the B pillar.


I carefully remove the spots welds along the back glass channel. My preferred method for removing spots welds is making a small pilot indent with a small drill bit then cutting the spot weld with a spot weld cutter. Alternatively, I also grind the spot weld away with a pneumatic cut off wheel. The latter method provides a safer bet at leaving an intact mating surface. I cut the spot welds from the underside of the panel since I want the actual sail panel itself intact. Avoid using an air hammer in steps like these to remove the metal after the welds are cut; it tends to distort the metal too much. Instead, I use my small pry bar (about the size of a flat head screw driver) and carefully pry the metal apart. It leaves a nearly perfect intact surface.


I make my cuts along my tape, and make a final cut along the inside corner of the rain gutter and the panel is completely removed.


My cut will be wrapping around the back corner of the panel and running right along this seam near the top of the back glass channel. It provides a good point of reference for removal of both panels and installation of the new panel. The new panel over the old panel shows how both are exactly the same.


The removal of the damaged panel is going to be nearly the same. I take a DA and sand on the body line to expose it. The old panel too was taped off and the new panel is placed over the old panel for a test fit. I chopped the back edge of the sail panel off so the new panel would fit over it better and more accurately. Then I made my traces as to where my cuts will be.


The damaged panel is cut out.


This is the back of the damaged panel showing the creases from the dents and just exactly how difficult/impossible this would have been to repair without panel replacement.


I remove or neutralize rust and corrosion with a wire wheel/angle grinder followed by zinc phosphate treatment.


Now I need to replace that section of damaged drip rail molding. I cut the damaged section from the car, and cut the replacement section from the chunk o' car from CJ.


I shoot the B pillar guts with 2 coats of Eastwood Rust encapsulator.


Since too much of the original drip rail was gone or cut away, I had to fabricate a patch so I could have something to mount the new drip rail molding too. I punch a series of holes in it with a pneumatic hole punch for plug welds.


I attach the patch with plug welds and grind them down smooth.


Second picture: I then weld in the new drip rail molding.


The replacement panel too then got several coats of Eastwood Rust Encapsulator on the rusty backside. Now the panel is fit. At this point I check everything, then recheck. Then check again. I use panel clamps to help maintain spacing and hold the panel. I begin the welding process with a series of carefully placed and spaced tack welds to avoid warping the panel. It is critical to let these welds cool NATURALLY, otherwise the metal will shrink.


After lots and lots of time (mostly waiting for welds to cool) the entire panel is welded in with a series of tack welds. All the welds are ground as smooth as possible. I use a flap disk on an angle grinder and do not grind too long in one spot as I want to avoid getting the metal to hot and causing warpage. I also let the panel cool naturally after I've been grinding on it for awhile.


I finish the process by making my plug welds along the back glass channel. These welds too will be ground down smooth.


After all the welds are completed, I fill over the welds with Evercoat fiberglass body filler. Fiberglass should always be used over a weld on a body panel as fiberglass filler is waterproof and will seal pinholes. Since I lost part of the body line because it was shrunken where the weld was, I recreated it by shaping the body line in the fiberglass. This actually went considerably easier and better than I had anticipated.


I feather the filler and smooth the body line to make it match the rest of the line on the panel. I skim over the fiberglass with 3M lightweight filler to fill low spots and create a level surface. This is creamier and easier sanding than fiberglass so it's used to create a better finishing touch. Any small holes, sanding scratches, or other imperfections will be filled in with Evercoat Easy Sand glazing putty.

Saturday, March 19, 2011

Full quarter panel and tail light panel finished

Today I blog about the completion of a major milestone for this car. You don't know this only because I haven't expressed it on here enough, but this quarter panel was the bane of my existence. It all goes back to LAST summer when I removed the quarter panel, then attempted--all winter I might add--to get it put on and lined up right. I was met with failure each time.

The biggest issue I was fighting was the fit in the wheel well. Since the edge of the original outer wheel housing was too shot to be used again, I cut this section off, and cut off the same section from a new outer wheel house to give a good lip for the quarter panel wheel well to mate too. The problem was I could not get the radii of the two to line up and was always met with a large gap inside the wheel well between the wheel house and quarter panel.

Finally Rosemary persuaded me to call Shaffer's, our local body shop, who is also the largest, and arguably one of the best, independent collision shops in the state. I finally took the car in there for it's second appearance (first was to get some frame straightening done) and let them deal with getting the quarter, trunk lid, and tail light panel installed. They did a fantastic job and it was worth every dollar. $1143 of them, to be exact. Let's start at the very beginning to do some review.


The quarter panel was in some bad shape due to a previous hack job of repairing it after some sort of collision damage. Of course this was revealed after i removed the paint as seen here.

So the entire quarter was removed.

This cross section shows the three sections of metal that comprised the quarter. It looks as if the middle piece of metal was the original quarter. They then put a quarter skin on it, and fabricated the piece on the top to create the body line. It is good work I must say.

The repair will require all of these reproduction pieces.

Because the rear trunk brace was dented in the middle and welded back together, I cut the entire thing out and welded in a new one.

If you noticed in the picture where the entire quarter is cut out, you'd have seen the trunk extension drop down was too worn away at the bottom to get a good weld to the quarter. I cut the drop down off a new one I had (that was accidentally ordered a long time ago, I might add), and welded it onto the old one. Also in this pic you can see the new outer wheel house lip on the old one.

...and the car with its new quarter.

New tail light panel and trunk lid fit in perfectly as well.

Finally, the real gauge of a bodyman's talent--the gaps. I'm including this pic because the door gap here is perfect and symetrical from top to bottom. Unfortunately I'm sure I'm going to have to remove this door once more. Hopefully I can get it put back on with such a nice gap.

So how did Kim, the body man doing this project get the wheel well to work out as perfectly flush as he did? He attached the wheel house lip to the quarter first, then fit the quarter. He then screwed the wheel house lip to the existing old wheel house.