Sunday, March 31, 2013

FIRST ENGINE FIRE UP

I find there are two key events to a car restoration: the day the car gets painted, and the day the new engine comes alive for the very first time.  Everything else is secondary to these two.

Well today, for the very first time, I heard and witnessed what this thing is like when its runs, after waiting and working on it for sooooooooo long.

Cliff's notes version: Built engine, tried to start, would not, tried different carb, started, proceed to videos at end.  To read the entire saga, continue with the following text.

The full run down of engine bling is 5.0 full roller block with GT40 heads (bronze valve guides), Scorpion aluminum full roller rockers, Sealed Power hypereutectic pistons, Edelbrock 3722 hydraulic roller cam (.498 int/exh, 220 duration), Weiand Stealth intake, Holley 600 cfm carb, ceramic tri-y headers, Pertronix Flamethrower II dizzy and coil feeding Taylor Spiropro 8 mm silicon wires.  I'm using Autolite 764 plugs gapped at 0.045".  This is all cooled by a Champion 3-row aluminum radiator.

Last weekend is when I was actually planning on doing the fire up, but I could get no voltage to the starter solenoid when the key was in 'start.'  I chased down every wire, checking continuity or voltage and everything checked out.  I had voltage at the neutral safety switch.  Kept following the signal flow and was going to check voltage at a 4-pin block connector under neath the dash; this is the last stop before dumping the wire into the headlight wiring harness.  It was at this point I noticed the red wire with blue stripe (the wire of interest) was taped up.  Getting excited I now found the problem, I removed the tape and found a bunch of crap spliced in there.  Two wires came out of it and ran up beneath the dash. 

"What the heck is this crap?" I wonder.  "What kind of idiot was this previous owner?"

But the two wires went to a switch--a switch hidden under the dash--that is.  Then I felt like I was just hit by a freight train. 

"It's an anti-theft kill switch!"  I pulled on the switch to see if it would pull down and sure enough it did.  Then, sure as the sky is blue, I had clicking at the starter solenoid.  One new battery later I was trying to get it to fire, but it just wouldn't.  All the starting fluid in the world bought me 30 seconds of doggy run time at best.

My carburetor was dripping gas like it was it's job.  I pulled it back apart and found my floats were way out of adjustment so I put them back to where they should be and tried some more, in vain.  By this time everything was a lost cause, my engine was well flooded, spark plugs drenched.  I took all of them out and let them dry.

Meanwhile a friend of mine sent me up his rebuilt Autolite 4100 to try since it was a tried and true carb that was pretty much plug and play.  We were really suspecting my carb had some serious issues by this point.  But I rebuilt it, so why wouldn't it have issues?!

With this new carb I finally got it to fire tonight, one week after trying for the first time and troubleshooting all week.  The first fire I had to keep it running with the throttle; it needed timed in badly.  After fetching my wife and teaching her how to run the throttle, I threw the timing light on it and put it to around 10* BTDC. (~2:40 in the second video).  Now it seems to run like a champ.  Only one leak (amazing) and it was the top radiator hose; I just didn't have the clamp tight enough.  I can live with that.  Needless to say, I'm pretty stoked.


Monday, March 18, 2013

Power to the dash

It's actually been over a week now, but I had finally finished installing my new Champion 3 row aluminum radiator (long story, more on this for its own entry), and got the last of the radiator hoses clamped down.  The entire motor was completely hooked up and wired up, ready to be primed, filled with coolant, and fired up.

Because I was not at a point to start this, the better part of my curiosity got me to at least hook up the battery and turn the key to 'on' just to see what would happen.  To my delight (but mostly surprise) the dash lights came to life, the windshield wiper motor posts were rotating back and forth, and the blower fan came on when I hit the switch (I've wondered for four years now what it would be like the first time that fan ever blew and blew the rest of the crap out that I couldn't get out.  It was extremely anti-climactic, and I had done a very thorough job cleaning out the ductwork).  I hooked up the headlights and they also worked.  My hazards worked (at least on the dash), and I had 12 volts to the electric choke on the carb.  I actually lost my breath for a few seconds when I first saw those dash lights, and the wiper posts going.  This was the first time in my ever owning this car that I witnessed power to anything, more or less something operating under its own power.  It was a sign of progress.

All the action is captured in this video...


Saturday, March 9, 2013

Installing trunk lid and quarter extension mouldings

I've been slacking on this very bad, because while the last entry shows the starter and alternator getting repainted, the truth of the matter is the entire engine is installed, hooked up and wired and ready to start.  I've been busy concentrating on that this winter so I can do the first fire up while it's too cold to do much body work.  But I'll talk about that later.

Speaking of body work...

Since this summer is when I will be painting it, it is always a good idea to do a test install of any bolt-on mouldings before you actually have your paint on the car.  I did the test fit of the mouldings that go around the tail light panel.  Mine were reproductions as I didn't have the originals.  They are stainless steel, pretty thin and flimsy so you need to be careful, but near perfect fit and over all good quality.  Since I'll be using their link, I'll give a shout out to my primary Mustang parts supplier, CJ Pony Parts, which is where I purchased these mouldings (and everything else for this car for that matter). They have frequent sales, free shipping on almost everything except freight, and all my experiences with their customer service have been overwhelmingly positive.

Because I already did a write up for their site on how to install the trunk deck and quarter extension mouldings, I will link you to it here


Sunday, December 2, 2012

Restoring an alternator and starter

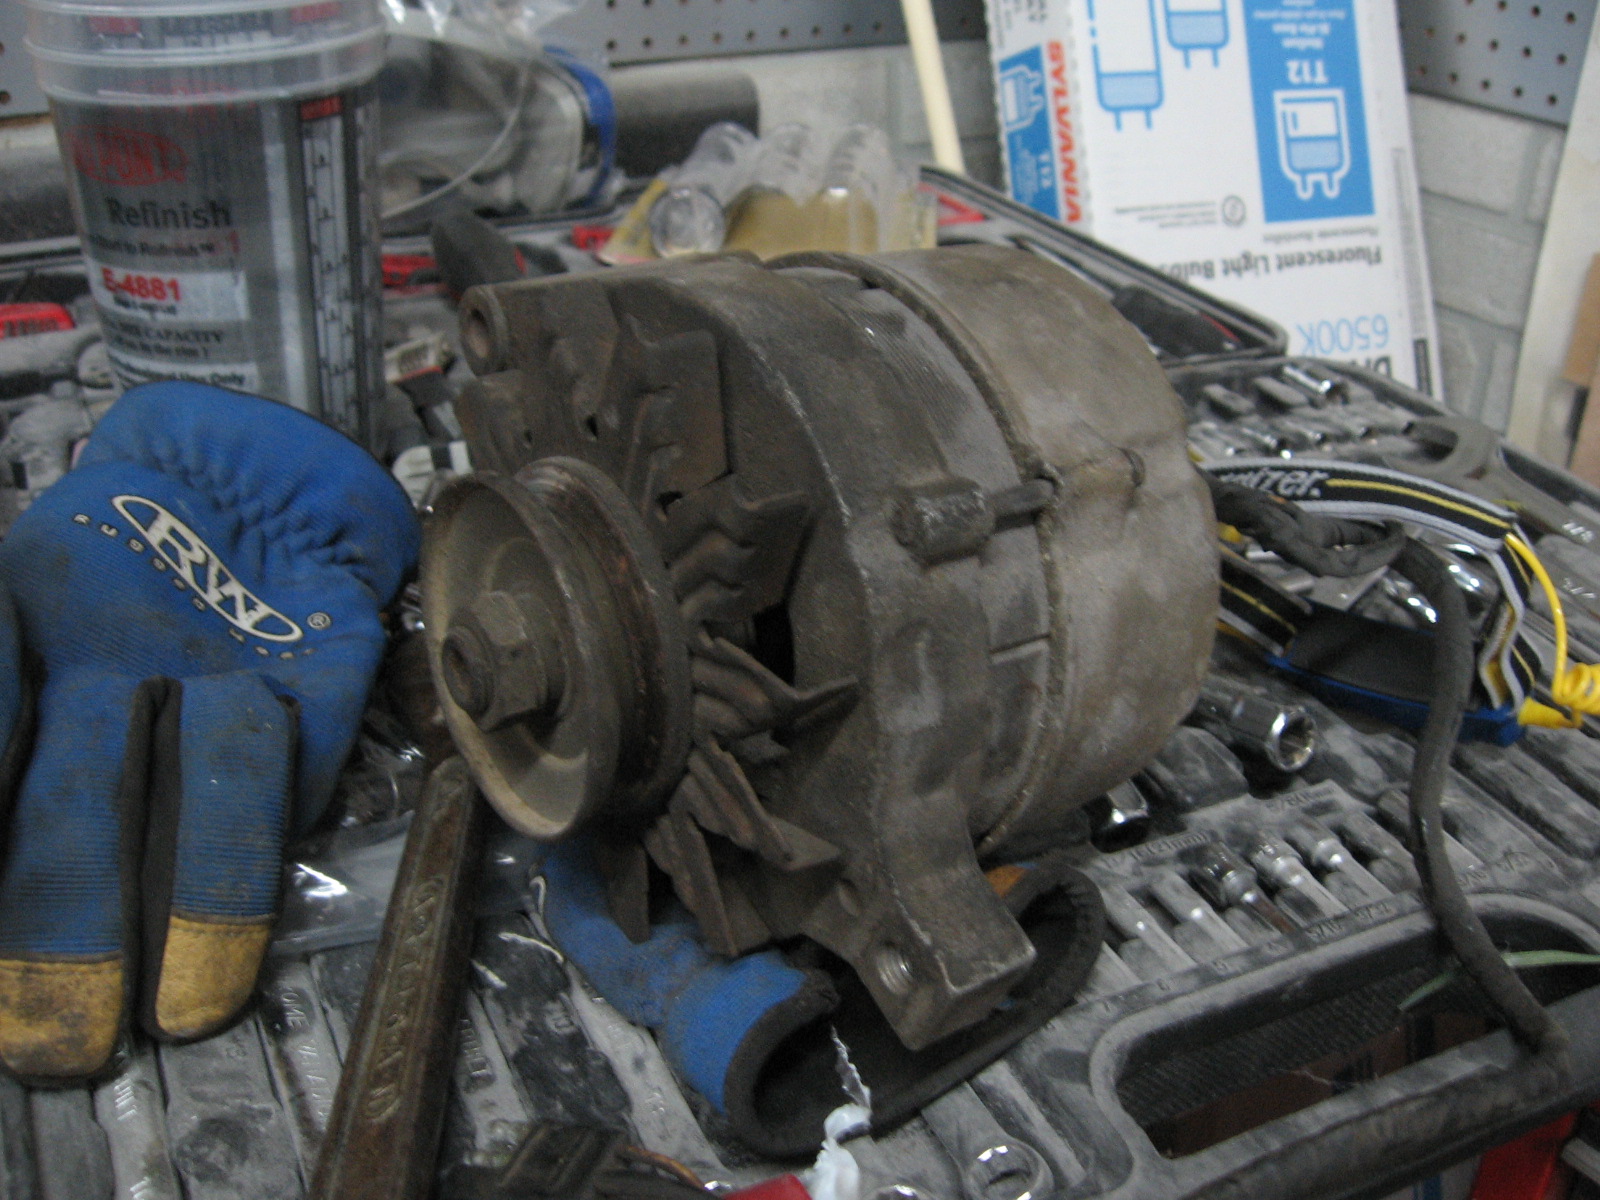
My alternator and starter were really crusty looking, but they both still worked great when I bench tested them at the parts store.  There was no need to replace them since they are both perfectly fine, so I just restored their appearances to new for aesthetic purposes.

Starter
I apparently did really poor photodocumentation throughout this entire process as I appear to have very few photos.  This is the starter as it started out.  I cleaned and degreased it well, removed the solenoid cover and blasted that down, then sprayed it with an aluminum paint.  I also sprayed the strap with aluminum paint.  I sprayed the body of the starter with Eastwood's Black Rust Encapsulator because it was matte black.
Now the starter is slightly improved.
 Alternator

This is the alternator as it started.  It is only 60 amps so I may still end up needing a new one.  This will at least get my engine started for the initial fire up, at least.


This is the magical aluminum paint I use to refinish all my aluminum parts.  This is what I sprayed the transmission with too.  It looks exactly like real aluminum finish.

This is how the alternator ended up.  To do this I removed the pulley and fan and sandblasted them, then etch primed and painted.  For the alternator itself, I scraped any crud off then sprayed down with brake parts cleaner.  I then wire wheeled to get shiny aluminum, primed, and painted.  The final result looks like it came straight off the parts store shelf.  I took some liberties with the color of the fan and pulley colors just for the sake of more color contrast.


Wednesday, November 28, 2012

Driveshaft restoration

In the last two months, I have learned it is ludicrously easy to bring a driveshaft back to life, make it look brand new, and so nice you don't even want to install it.  I initiated this pursuit as it's my goal for the underside of the car to look almost as nice as the...topside.

I wish I had a 'before' picture, but the driveshaft was crusty, crusty black.  I started by taking my scraper and scraped all the junk off it.  After this I took to it with brake cleaner which took everything off right down to the rusty metal.

On my rolling shop table, I made a convenient driveshaft workstation by resting it on jackstands.

After it had been cleaned with brake cleaner, I started sanding the rust off with a DA which quickly brought the metal back to looking brand new.

These are the original factory-applied stripes (white, green, red), used for color coding the driveshaft .  As the car moves down the line it is accompanied by a build sheet.  The line worker would grab the driveshaft dictated by the color code on the build sheet.  Or so goes the lore that I have read.  I took measurements for each of the strips so I could repaint them.  Closer to the end of the shaft were two gray lines.

The driveshaft is completely sanded, looking brand new.  Next I treated it with several coats of zinc phosphate to protect against corrosion and condition the metal.

...then remeasured out the stripes and taped them off.

All the stripes are taped off.

I repainted the stripes with regular old enamel model paint...basically because it was the only thing I had where I'd have all the colors, and figured it would have *some* durability.  Two gray stripes at the end, then the three middle stripes.  After the stripes were painted I clear coated the whole thing with several coats of cheapie rattle can Duplicolor Clear.

And the finished the product up close.  I wasn't striving for perfection on the stripes since the originals were very sloppy.  I also wasn't striving for exact color matching.  As the final leg of the driveshaft restoration, I took it to my transmission rebuilder where he put a new yolk and u-joint on it, so I could have a fresh new yolk to slide into the freshly rebuilt transmission.

Saturday, November 24, 2012

Transmission rebuild and reinstallation

Once it got too cold in September to do much more body work (too cold to spray epoxy) I shifted gears to the engine.  My goal and projects for the winter are to get the engine fired up for the first time ever...and actually have a running car.

I had no idea as to the condition of the C4 that came mated to the blown 289 that came with the car, but I had it rebuilt figuring it was probably pretty tired.  I took it to a local old school transmission rebuilder who has been rebuilding transmissions before the C4 ever existed--L&S Transmission in Delton, MI.  Needless to say, Lane has rebuilt a lot of C4's.  The transmission ended up being shot inside as Lane found some broken gears so my gamble to rebuild was a wise one.  He added a shift kit and new torque converter from Precision of New Hampton (fellow Iowa boys) with a stall of 400-500 over stock.

Since I had put the engine and transmission back in the car to move the car from Iowa to Michigan, my wonderful wife, Rosemary, helped me with the removal.  Though she tries to avoid anything Mustang she did admit it was kind of fun pulling the engine out and it didn't take us more than 30 minutes.  Which is probably why it was fun for her.


This is the transmission as I got it back from the rebuilder.

New torque converter from Precision of New Hampton (Iowa).

The transmission was cleaned with paint prep wax and grease remover (even though it was cleaned at the rebuilder's) and primed with engine primer.

Then repainted with Rebuilder's Aluminum finish to give it a fresh new aluminum look.

Before putting it back in I took advantage of its absence and cleaned and prepped the undercarriage.  This is the original Ford Red Oxide on the undercarriage in NEAR PERFECT condition!  To preserve this rare bit of history, I only spot primed areas where I sanded through or had bare metal with Eastwood's Rust Encapsulator (Red), which ended up being a very close match for Ford Red Oxide.

Next spacer plate is attached to the back of the engine via mounting pegs and then the flexplate is bolted to the crank.  DO NOT FORGET TO INSTALL THE SPACER PLATE FIRST or you will be sorry!  I sanded my spacer plate down well with DA to remove rust then treated it with zinc phosphate to give it a nice new looking finish and some rust protection.  Even though they appear to be symmetrical, the holes on the flexplate only line up to the crank in a single orientation, so there is only one correct way to install the flexplate.  Install the retainer ring next and rotate until the holes line up.  Place high temp oil-resistant thread sealant on the bolts and tighten down to spec using alternating tightening sequence.  A buddy will need to keep the crank from moving by placing a socket and breaker bar over the front crank bolt.

Install the torque converter.  Gently push it into place and slowly rotate while still pushing.  It will seat about 4 times.  For the final seat it will seat in completely.  Rotate several more times to make sure it is completely on, otherwise you can damage the pump if you try to install it and it's not completely seated.  Place a straight edge across the bellhousing and measure the distance from the edge of this to the snout in the middle of the TC.  It should be 1/8 of an inch. 

Orient the drain plugs so they are straight up and down, then place a 7/16" deep well socket over the bottom drain plug as an alignment aid when mating to the engine.  Orient the flexplate on the engine block so the holes for the drain plugs are straight up and down.  With the engine block hanging from the hoist by a leveler, level the engine so it is exactly at the same pitch of the transmission then push it together.  The socket should come right through the hole in the flexplate to know the alignment is correct.  The pegs in the engine block should fully seat in their respective bosses in the transmission bellhousing.  DO NOT PULL TRANSMISSION AND ENGINE TOGETHER BY TIGHTENING BELLHOUSING BOLTS.  They should come together smoothly.  Bolt bellhousing to the block.  The studs on the converter should also be sticking through the holes of the flexplate.  Rotate the crank with a breaker bar to rotate studs to the bottom so they can be accessed to install nuts.  Tighten all nuts down to torque.


The engine and transmission mated together.

Reinstallation (with starter bolted on)

Undercarriage.  I have a body plug kit and installed new plugs.

With transmission crossmember reinstalled and torqued to spec.

Tuesday, November 20, 2012

Seam sealer

It's been about 4 months since my last post.  However my absence on here is by far no indication of actual progress on the car as I've had the transmission rebuilt, reinstalled with motor, undercarriage cleaned and touched up, drive shaft restored, and slowly getting the motor externals hooked up.  I all  but was forced to give up on body work in September as I was running out of warm enough days.  I don't like to block if I can't shoot epoxy soon after.  It is annoying and aggravating when a sand-through spot to metal flash rusts if I don't epoxy soon enough.  And truth be told I'm utterly sick of bodywork.

First off, here's how that quarter skin ended up after the Slick Sand application.  The picture I don't have included is after it was blocked.  To my surprise it was incredibly straight and there were very few low spots.

And this was the current status of the car with a panel mock up.  I took the fenders and hood back off so I can do other work.

Seam Sealer

First thing's first, and before you do any seam sealer work, read this.  I employed these techniques for this round of seam sealing, though I did not on previous rounds and am left wishing I did.  Going back to some of the very earliest postings in this blog, I described sealing seams with 3M Fast n Firm (they really need a better name for that), and 3M Brushable seam sealer.  I'm here today to tell you they are garbage now, and that sealer is now cracking.  

The way to go is with a quality non-hardening (it hardens but not to the point it's like brittle concrete) 2k seam sealer for lasting seams.  There are a number of reputable brands making good 2k material such as SEM, 3M,  PlioGrip, and others which escape me.   After doing my research I ended up with Valvoline's PlioGrip as it is OE material for cars made today.  The downsides is the expense.  The cartridges are expensive in themselves, but you also have to buy a specific applicator gun for the brand of sealer you are buying.  And the guns are not cheap...mine was around $60-70 if I remember right.  PlioGrip makes 3M's gun, only the PlioGrip gun is cheaper than the identical 3M gun.  So if you buy the less expensive PlioGrip gun you can not only use PlioGrip seam sealers in it but the entire line of 3M 2k sealers as well.  All in all, walking out of the store with my gun, 2 cartridges of seam sealer, and a bag of extra tips, I was looking at $120.

 
I went with the #6 non-sag sealer to do everything, including gutters.  It sets up relatively fast...you have around 3-6 minutes to work it before it starts to set up.  The glorious thing about it is it has no VOC's and is virtually odor-free.  I did not need to wear a respirator to apply this, but the 3M sealers I was adding several years ago about knock you out if you didn't have a respirator.


I have the factory body and seam sealer assembly manual so I could see where all the seam sealer went, how it was to be applied, and what type of sealer was  being used.  The easiest way to summarize is basically ANY seam created by one panel of metal joined to another panel is sealed on the entire car.  This includes where the tail light panel comes together with the quarter on the outside rear as well as the insides in the trunk.  Don't forget under the drip rails of the windows either.  I add sealer and then smooth with my finger.  

I'm using the double-masking method Brian describes in his article I linked above.  Here is the door when sealing the seam of the skin and door shell.

Sealing passenger side door jamb.  The thin channel in between the tape is where the seam being sealed is located.

It takes some time and tape in preparation, but masking off both sides of the seam ultimately makes the process of adding and smoothing the sealer go faster because you don't have to be neat about it.  And once the tape is removed it leaves a very clean edge.  I removed the tape just as it was starting to set up, otherwise there was a tendency for the edge of the sealer to pull up a bit.