Monday, February 7, 2011

Polishing stainless steel

I'm on a roll in getting these blogs hammered out. Today's is short and sweet, but makes such a catamount difference in the overall presentation of the car. It can only be a blessing that most of the shiny trim on a car--mostly that around the windows--is stainless steel. This means it will never rust, pit, or corrode, and with the investment of time, can be made to look better than new.

Polishing the stainless steel is a good winter activity as it doesn't require much...a warm basement shop, a bench, adequate lighting, a drill, and a polishing kit. I'm using an Eastwood metal polishing kit, which comes with 5 different buffing compounds and a bunch of different buffing pads, that mount to a drill.

Eastwood buffing kit

The kit comes with instructions that are pretty straight forward. I first wash my pieces with soap and water to get the dirt off, then pick out any small dents or imperfections that may be in them. Then it's on to buffing, moving from coarsest to finest buffing compound. Here's an example of what can be done:

This is a piece of window frame before polishing

The same piece after 40 minutes worth of polishing

Sunday, February 6, 2011

Door skin and repair, part 3

Continuing the third installation in the saga of complete door restoration, I bring my door ever so closer to completion--or ready for primer.

To pick up where I left off last time...I painted the door. The jams, or areas otherwise prone to the elements and rust were treated with several coats of Eastwood Rust Encapsulator, which will be primed over with epoxy primer when the time comes. The interior door panel was painted with black semi-gloss lacquer. The door panel metal is stamped to resemble vinyl. Ford used semi gloss lacquer paint here as it does not fill in the grain. Before painting I had applied a light coat of etching primer to etch the bare metal.

Next came the door handle install. I already installed the lock which is a very simple procedure. The pre-drilled holes in the door skin weren't in proper alignment for the door handle bolts, so I had to hog out the holes. Since the holes were now enlarged, I had to weld shut the part of the hole no longer required so the holes were smaller than the nuts attaching the handle to the door.


The welds look big and ugly, but once they're ground down the new holes are effective.


The bare metal is covered with etching primer and the new door handle was attached to the door. These door handles are Scott Drake 'show quality' handles. They have quality chrome and are made in the USA. They are a nice unit and resemble the originals exactly.

Next the window is installed. Window installation is a tricky procedure--the first time it's done. After you've done it once and figured it out, a window can be installed easily in 15 minutes.


Next, the beltline felt and seal is installed. I used a set of Repops brand that I got from CJ Pony. I also recommend this piece. To install the beltline felt, the bottom window stop rubber bumper is removed, allowing the window to be cranked all the way to the bottom of the door, below the door line at the top of the door. This gives you room to install the beltline felts and rubber seal. The felt strip goes on the interior side, while the rubber seal goes on the exterior side. Installation is very simple as the seals merely snap into place.


I now have a nearly complete door. The only thing left is vent window installation. This will not take place until I have replaced the necessary seals on the window.

Saturday, February 5, 2011

Monte Carlo bar installation


Today's blog is theoretically a simple procedure, but involves a single complication many Mustang owners have to fight: the shock towers tend to fall in and need to be spread in order to fit the bar back in. A Monte Carlo bar keeps the shock towers from collapsing in, especially with the weight of the engine pushing down on the middle of the car, pulling the towers in. Additionally, the Monte Carlo bar reinforces the front end offering better handling.

This bar is a stainless steel Scott Drake bar. Several benefits of this bar is stainless steel as opposed to chrome (won't rust or pit), has oval bolt holes for the fender skirts allowing for install flexibility, and square holes for carriage bolts for the top of the fender skirt.

The actual procedure itself was relatively straight forward. I jacked up the car a few inches by placing the jack in the middle of the engine bay cross member. This allows the weight of the tires to pull the shock towers out. I then placed a porta power between the shock towers and widened in miniscule increments until I could fit the bar into place. The bar was secured on one side to the side of the fender skirts (it uses the same holes as the coil spring cover), and drilled out the holes in the top of the fender skirt. For this I used stainless steel carriage bolts that I polished to match the luster of the bar. The trick is to not completely tighten down the bolts until the bar is completely mounted. Moving on to the next side, the bar wanted to pop up a bit and not sit flush on the metal, but once the nuts were tightened on the bolts it pulled the bar tight up against the metal. And the finished product is what you see here.

Sunday, November 28, 2010

Fenders primed

This is old news, as in it was the bulk of what I did this summer. I was surprised to see I haven't posted the progress on the fenders yet, so here goes.

The fenders have been a long, frustrating process. From the aspect of being rust free, they are good, solid--virtually perfect--fenders in that regard. From the aspect of being dent and ripple free....not sooo much. There were many small low spots or imperfections all over both fenders that I filled in with either plastic or fiberglass filler depending on the need, or just glazing putty. To put it briefly, I began overzealous with the filler and filled anything and everything. After I thought I was ready to start spraying, I decided I was then not happy with the amount of filler (basically out of fear of filler contour I might get in the final product) so I then proceeded to remove 70% of the filler I put down and put more effort into working out the low spots with a hammer and dolly. While painstaking, it was definitely in my favor as some of the low spots I was able to completely work out and required little more than a skim coat of glazing putty. By now this is probably boring you all, and you might not have even read this because you've already skipped down to the play by play action.

These first two pics basically show what we're starting with. This is the filler I put on the first time before I decided to go and take most of it off. Much of the filler on the top was then reduced to small skim spots.


I used the infamous Southern Polyurethanes (SPI) Epoxy primer to shoot on the bare metal. SPI is best known for their epoxy.


For this first painting step, I was working with both fenders and the cowl. This is after shooting them with epoxy. I shot two coats of epoxy with 30 minute flash time in between coats.

I then filled in minor imperfections with a skim coat of glazing putty. This pic was actually before I sprayed the cowl. I originally had the entire cowl and both fenders sprayed with Sikkens Washprimer, but after seeing some rust starting to come through that, I decided to sand it all back off and go with Epoxy, which is considerably more durable and corrosion resistant.


After the epoxy was on, I laid down some SPI 2k filler primer. The Epoxy needs to be sprayed within seven days so I had to plan my timetable ahead to make sure I could get on all the coats in the right time frames. I sprayed on three coats of filler primer at a time. This stuff is great and is very thick. It fills in very well and sands easily to boot. Here I have applied a guidecoat to the cowl and am blocksanding it smooth with 180 grit.


Of course I wasn't happy with everything after getting my final coats of fill primer on. I could still see some weird contours from the body filler that weren't natural for the car so once again I sanded off all the primer in select spots, removed the filler, bumped out the low spots better, and filled again.


After redoing everything, I again had to shoot the spots I fixed with epoxy followed by filling primer.


Saturday, November 20, 2010

door skin and repair, part 2

Part two of what looks like will be a three part series... After the door skin was fit, I finally got around to getting it permanently installed. To do this, the edge of the door skin is hammered down flat against the underside of the door, where it is then welded to the body of the door.

Picking up right where the last blog ended, all the rust was removed with a wire brush on the angle grinder, shot with a few coats of rust converter, and then shot with two coats of Eastwood Rust Encapsulator as seen here.


I could not find a reproduction insulator that goes between the door brace and skin, so I fashioned one out of cork that was the same thickness as the original insulator. I straightened the original staples out and then reused them. I then reinforced it by wrapping duct tape strips over all stapled areas, and finally a duct tape strip ran the entire length of the cork to cover it and hopefully prevent some degradation. The verdict's out on how well it will hold up.

The edges of the door skin were then hammered over and welded to the door. I ground the welds down.


The completed door skin.


I had a problem with getting tons of tiny little dimples across the bottom from the dolly, even though I was trying to be careful with it. I ended up pushing hard on it with my palm and using that as a dolly.

Next step in the repair was to fix this rusted out lower fron corner of the door.


The offending area is cut out.

A new piece is fabricated from scrap metal I saved from the trunk lid. I pounded this on a large pipe to give it a round contour that matched the contour of the door.


The piece was then welded in. It wasn't a perfect fit and there were some big gaps on the bottom and right side, so I had to fill that all in with the welder, leaving it less than pretty, but I've seen much worse weld jobs.


But after grinding down the welds it looks almost as good as new. It won't be in a visible spot and will receive a skim coat of fiber glass filler to cover up any pinholes where the welder didn't completely fill in.


Wednesday, October 6, 2010

Replacing door skin, part 1

Holy nuts it's been a long time. I've been working something insane at this car the entire summer trying to maximize productivity while the weather is nice. Some days this summer were just plain too hot, while others (most, it seemed) were too wet. It seemed like it rained 4 of the 7 days a week this summer. I've done some serious work on the fenders and they're currently primed. I'll have more on that later. Secondly, I have removed the entire quarter panel and tail light panel for major reconstructive surgery. More on that later as well. It just so happens that the video card on my other laptop (that houses all the pics of this project) has taken a dump, so until I retrieve data off that computer or replace the video card, I'll have to post progress with pics I've taken and uploaded to Rosemary's computer.

Today I go through a door skin removal. My original passengers door had rusted through in the front bottom corner, which is a common place for the doors on these cars to rust through. I bought a different old door that appeared to be in good shape (passed the magnet test and all), it just had a crease in the front that the seller (and old body guy who restores Mustangs) said would be easy to remove with a stud welder. Maybe for him, but not for me. Also turns out there was still quite a bit of filler on the door and some rust spots. All of this was on the skin. Since the skin is such an easy fix and a new skin is cheap ($50), I opted to replace the skin. I'll probably do this for the driver's door too as there are many dings in the door.


After receiving the door I dug in to see if I could locate rust or filler, which I did. Turns out the door was not looking so great, and the crease was a very difficult fix. Not worth it.

The firsts step in door skin removal is to go around the entire edge of the door with a grinder and grind away the skin where it folds over the edge of the door. This will break the skin away and it will start to separate as seen here.


Once I've ground the entire edge of the door and cut through half a dozen spot welds, the skin lifts off.


I now have the trash skin, on the left, and the door shell, on the right.


I then took the new skin and did a test fit.


As the pictures show, even though it's a reproduction skin, it fit nicely and the door will look brand new on the outside. The skin has a few dings from shipping (and I think I gave it a new one tonight) but they are minor and nothing that can't be worked out with a hammer and dolly.


Now that I know the skin fits, I can be at ease and concentrate on the next step...this rusty inner door. It's not pictured, but I then hit this with a wirebrush on my angle grinder to remove all the rust. Next I'll degrease it, spray the entire inner door with a rust converter, paint it with some rust encapsulator, reinstall the window and regulator and door handle/locking mechanism, put some rubber undercoating on the inside of the door skin for vibration dampening, and weld the skin on. Put a few coats of lacquer on the interior side of the door, install the new window felts and seals, and finally the panel and this door will look brand new. All this to come...

Wednesday, June 2, 2010

Gas Tank

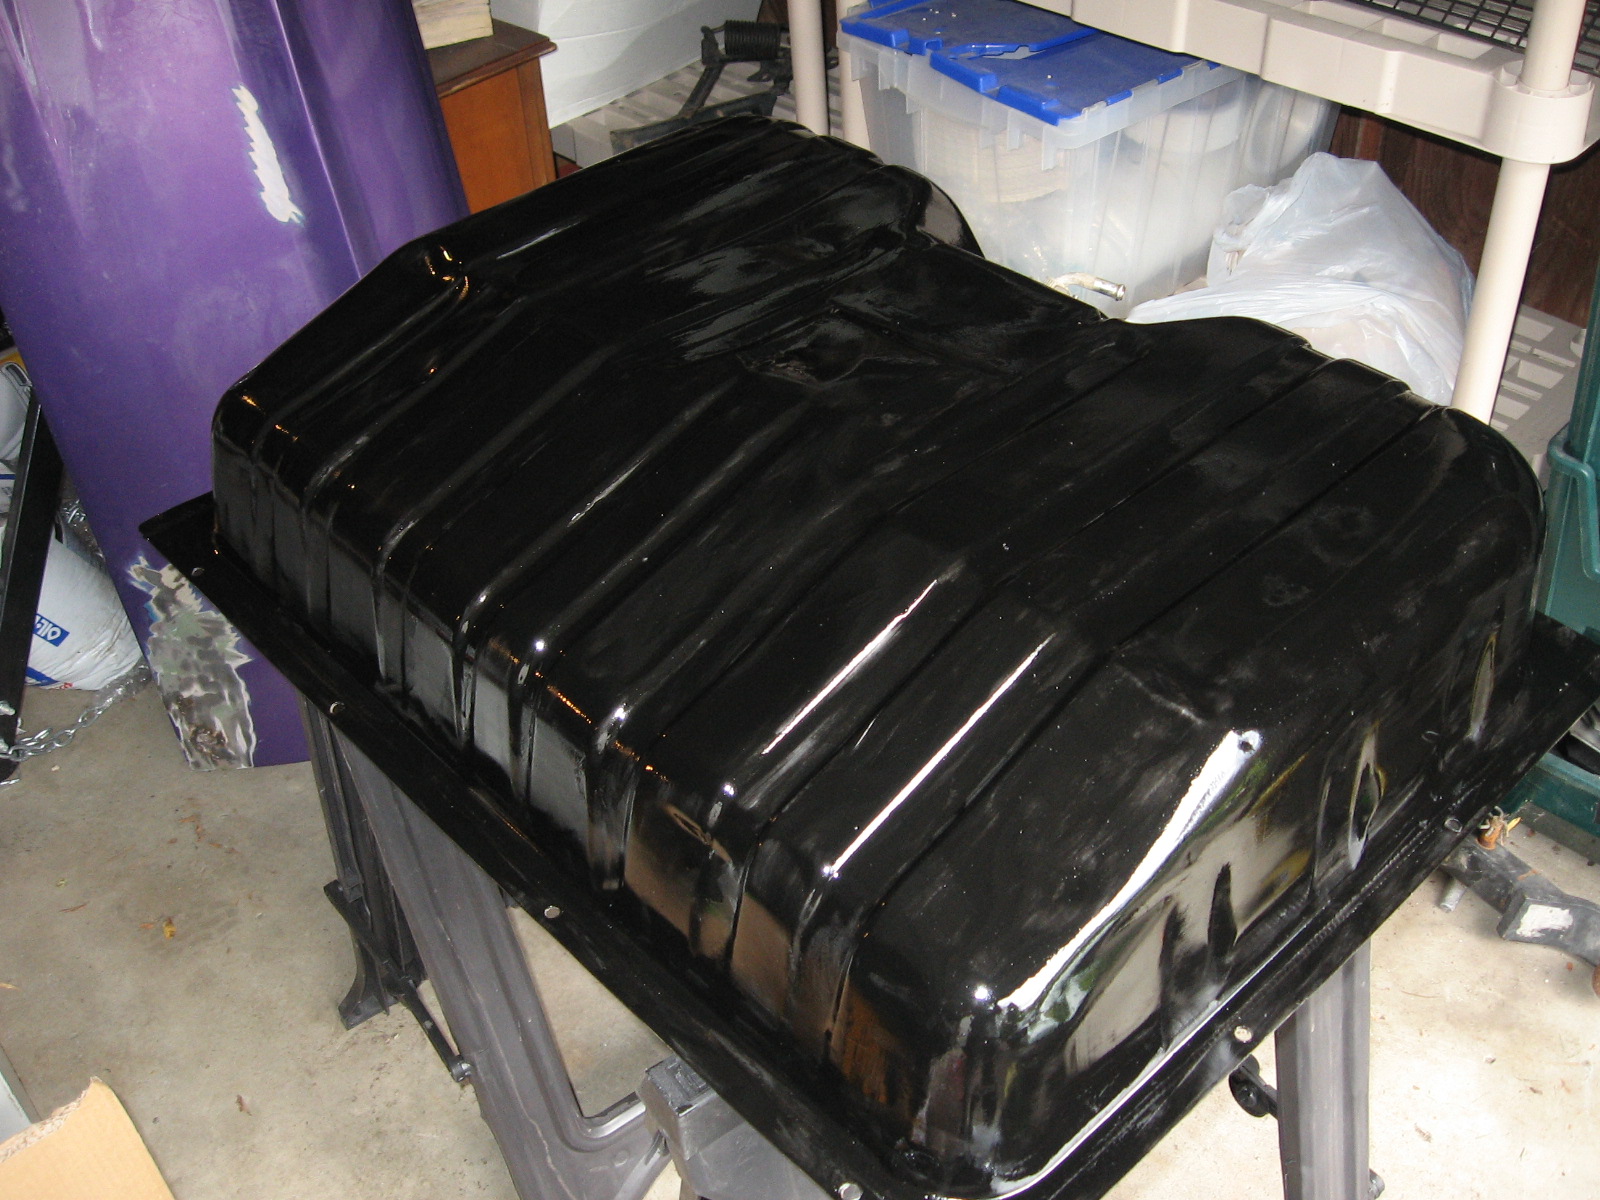
For today's posting, a very short and sweet entry on the protection of the gas tank. I don't know what was considered correct for the car, but I'm sure the gas tanks originally came as unpainted steel, leading to their inevitable rusting. We took a few quick hours of measures to prevent this. It won't be concours, but it will sure look nice underneath the car, and even nicer in the years to come when the gas tank is protected from rust.


1. The gas tank is stripped down with a wire brush and cleaned/degreased very well. Rose begins to apply several coats of Miracle Paint. This is her stupid smile, not her serious smile :)

2. The gas tank is now encapsulated in a hard layer of Miracle Paint to be protected for years to come. And it looks great too.