Sunday, January 31, 2016

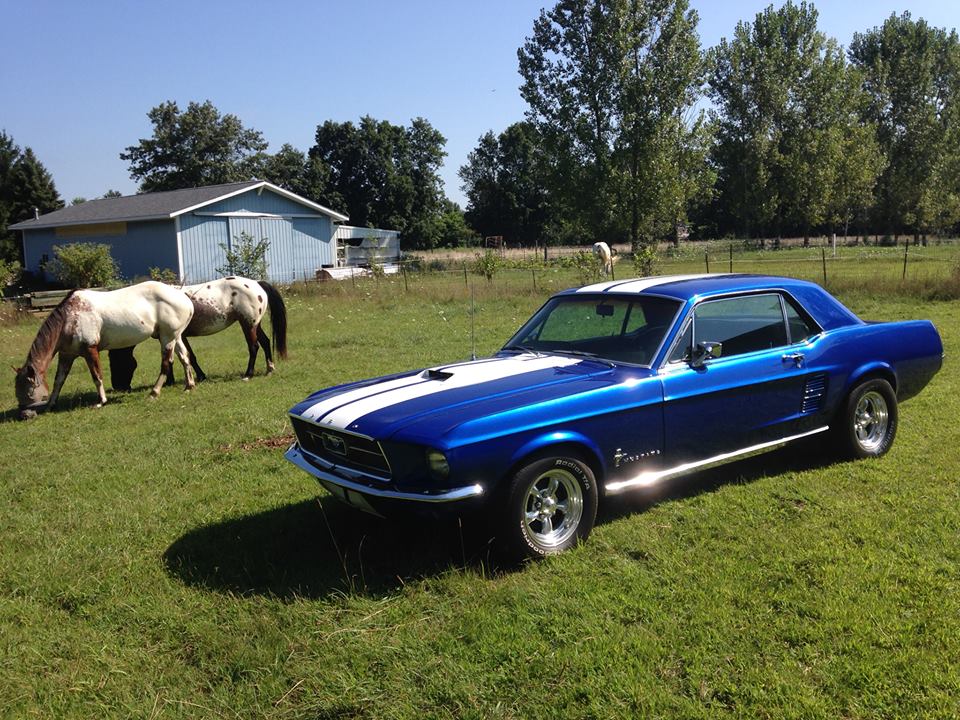
The car is (has been) finished

Just a minor detail, but I've worked so [not] hard to keep this blog going for 7 years to chronicle my progression and efforts through this project, and don't even mark the crowning moment of the achievement.  Specifically, NINE MONTHS ago I finished the car, and am just not getting around to updating it.

I don't intend for this to be the end of this blog as I still plan to post how-to's for how I did many things.  I'm just getting lazy I suppose.

Well, all through the winter of 2014/2015 I was slowly adding parts to the car...trim, windows, the final fixins'.  I had a big kitchen remodel coming up that summer so I knew I needed to finish the car before then, otherwise it wouldn't get finished or driven that summer as all my time would be spent on the kitchen.

I got classic car insurance (agreed value) through Heacock, whom I highly recommend.  I got quotes through Hagerty and Grundy, but being I'm in MI with one of the highest car insurance rates in the country, they were very expensive and Heacock was several hundred dollars cheaper and with better coverage to boot.  Then I took care of everything else, including registration and license plate, which was another almost surreal moment.

And finally, on one fateful day in May, I loaded it up and took it into the Muffler Man exhaust shop in town.  I see a lot of hot rods going through there and they were enthusiastic to do my exhaust job too.  They did a fantastic job of getting the exhaust installed and then I also had them to a front end alignment with the specs I brought in for the Shelby drop.  They have a laser rack and did great there too.  They have several real old school guys at this shop and that's exactly what I wanted.

In the end, the exhaust install was great, car sounds a little louder than I'd like with these Slowmaster 40 series Delta Flow and 2.25" pipes with H pipe and Tri-Y headers, and drones quite a bit, but still sounds good.  It handled and drove so nice and smooth...it was a great summer.  I took it to a few shows, drove it to work a few times, and for once just got to enjoy it.  Enough talk, here's some pics and a video.


First time at the gas pump

Out to pasture.

Getting exhaust and alignment.
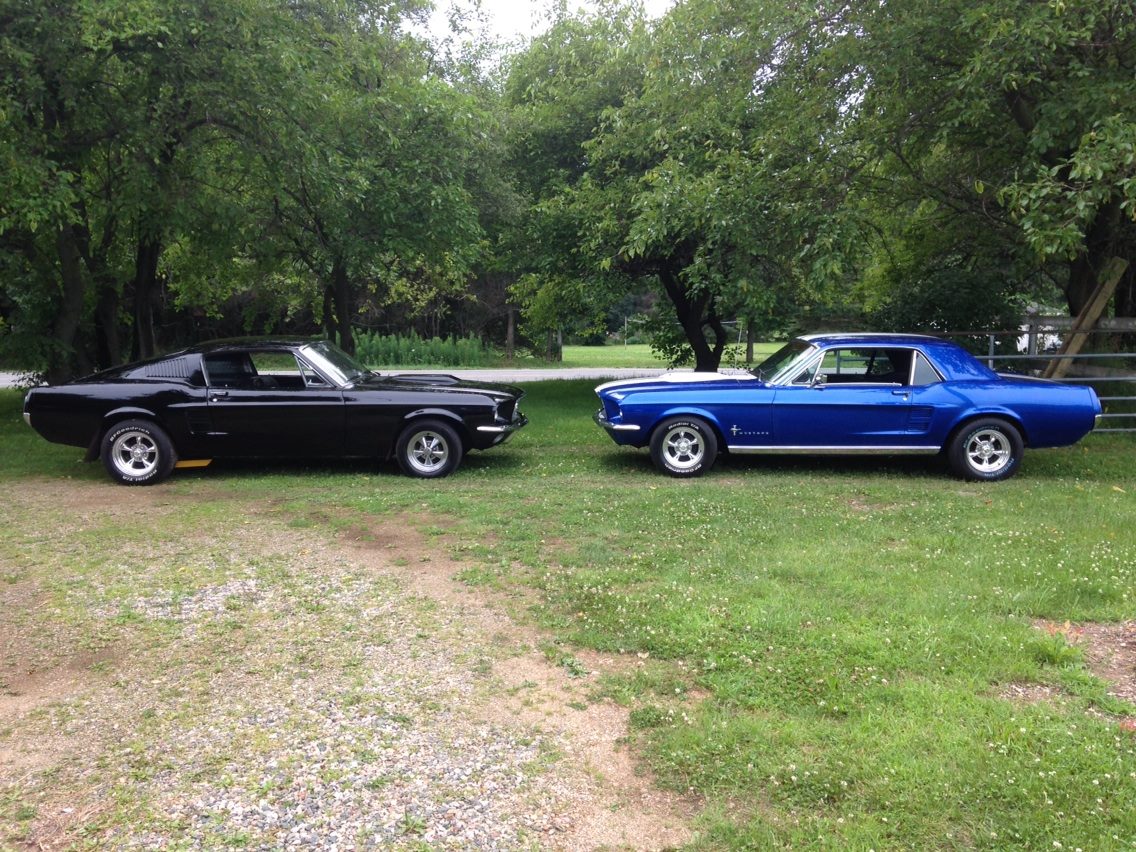
67 play date.

Our first car show.

Rose and Junebug came out to celebrate its first show appearance as well.

Saturday, April 11, 2015

Upholster and parcel shelf installation

So I've pretty much given up on maintaining this blog in any chronological order of events that have transpired.  As it is now, you wouldn't think the car is anywhere near getting on the road based on the last update.  But it's quite the contrary...I have most of the interior in (except for the front seats) and hope to be taking it on its maiden voyage next month...fingies crossed.

So just maybe one reason this has ballooned into a 6 year marathon project is because there is no easy task, and even the easiest tasks aren't easy.  As in, who would have thought installing a simple parcel shelf would have turned into such a project. 

I will have 2 6x9's in the back, and I didn't want the speaker grilles visible, nor did I want an advertisement for the speakers themselves.  I had a Scott Drake fiber board package tray, and took some moonskin from a headliner, cut holes in the tray for the speakers, then ordered some speaker grille cloth on Ebay (it's very cheap).  After a lot of debating on different ways to do this, I ended up with this scheme.  My wife sewed the speaker grille cloth inserts to the three moonskin sections.  This is a mock up.

Then I pulled it tight and glued down with weatherstrip adhesive.  (I glued it in the bathroom so I could turn the fan on because the adhesive has some VOC).

The finished product came out very pro looking.  The moonskin is stretched over it as tight as a drum.

Close up of the seam.  She did a nice job.
The package tray installs by sliding the edge along the window under the large lip of the window gasket.  I had to use a screwdriver to run along the edge of the lip to get the package tray under there, and even then it took some work to get it back all the way.  The package tray will then rest on top of the tab to the quarter trim  panel that also sits on the metal shelf.  There is also some jute insulation padding that goes between the board and the metal shelf.  When the back of the package tray is slide under the window gasket lip, it makes the front pop up.  Originally, there were two clips that held the front down, but mine were long gone, so I fashioned my own that I am quite pleased with.

I cut a scrap piece of sheet metal about an inch wide and maybe 3 inches long.  I put a bend about 1/2" from one edge.  Originally I was going to paint it, but I was worried the sharp edge of the metal would eventually wear away the upholstery, so I dipped it in Plastidip, which ended up making it look professional as well as safe on upholstery.  I screwed this on and it holds down the front perfectly. I screwed them on about 3.5 inches from each edge.
This is the view through the rear window with the seat back installed.  It's not intrusive, and what you can see of it looks like it's supposed to be that way.


Saturday, December 6, 2014

How to install a trunk torsion bar

I'm posting these instructions on how to install the torsion bar because this is a huge area of need on the web, yet there is little to no actual good (or accurate) information on how to do this.

It is the scariest thing you will do on your car, yet with the right tool and method it is remarkably simple and fast.  You can easily install both of your torsion bars in 5 minutes!

I have written instructions below, but I actually demonstrate the installation in this video:


Things needed:
  1. Safety glass: duh
  2. Face shield: I don't want that thing hitting my face if it snaps back
  3. Ear plugs: if the bar snaps out it is LOUD

This tool made out of a piece of 1/8" steel flat bar will make this job very simple.  It is the same tool used by Ford.  They are available for sale online or you can make one yourself, which is what I did.
 
This is the plan for how to make the tool.

The tool fits onto the end of the torsion bar as shown.   

You'll want to install this with the trunk open as far as possible because this is the point where there will be the least torsion on the bar.  I prop the trunk lid open with a little board.  First, set the L-shaped end of the bar in the hinge as shown.  I put a zip tie over to hold it in place during the install so it doesn't pop out.
The tool is going to connect to the other end of the rod.  Before it is bent down, this C-shaped end of the rod is going to be pointing straight to the back seat.  Once you put the tool on it, twist it down, slide it into the first tab, then slowly raise it up into place and it will lock into position.  This whole step here takes me about 15 seconds to do.  Start with the first slot. 


Friday, November 28, 2014

Adding panel emblems, lettering, trim, grille, and molding

After the car is all buffed out (and in some cases even before) I started adding the panel letters (also called emblems), trim, and molding.

Adding the molding to the front edge of the hood is pretty easy and straight forward; it snaps onto the front edge of the hood and then screws on from underneath.  The screw holes are already there in the hood, even on a reproduction hood.

However,  before I added the molding to the front edge of the hood, I added the F O R D lettering.

I used these adhesive letters from KS Reproductions.  After using Scott Drake adhesive lettering for the back, I liked the KSR ones much better.  The adhesive was stickier and stronger.  I prefer the adhesive much to the letters with the pins; no drilling holes this way, and no pesky barrel nuts to push into holes and then pressing the letters in.

 I used this article from Mustangs Monthly to get dimensions for the lettering.  Starting with the hood...


I did my install just as described in the article.  The bottom of the letters are located 3/4" from the front edge, and the measuring tape I used (borrowed from my wife) was 3/4" wide so it worked perfectly to line it up along the edge of the hood.  I taped the end to the edge of the hood, and then put a piece of tape at each measurement where the left side of a letter would go.  I just positioned the letters to make sure they looked right, and then I stuck them on.
I then did the same thing for the driver's side of the hood.


...and the final product.


Installation of Wide Grille Molding
I highly recommend buying an original molding and refurbishing it rather than go with a reproduction wide molding.  However, if you must use a reproduction molding, then use a reproduction molding for each side.  I bought an original wide molding set to refurbish, but one of the sides had a mounting tab missing.  So I bought a repro molding for that side, but it did not match the other side in dimensions.  So I opted to make the original molding work as best I could, and as it turned out it worked just fine.

To repaint the moldings, paint them with Krylon #1403, Dull Aluminum.  This will be a near-exact match to the original argent color. 

I don't have any pictures of when I did this work.  However the installation is easy; there are tabs on the front of the molding that screw onto the headlight buckets or stone deflector.  Then the thin molding is mounted, by setting the mounting studs in place and adjusting them to line up with the holes in the headlight bucket and stone deflector.  Then they are nutted down.

Installation of Grille

I wrote these instructions for CJ Pony parts to install the grille.  I wanted a more modern/custom look and ended up painting my grille with the Mastercoat Silver Rust Sealer, which is aluminum colored,  and then painted it with an aluminum metallic spray paint to get an aluminum colored grille.  I used the spray paint because it was more UV resistant than the Mastercoat silver primer.  And it looked pretty cool:


Installation of Fender Ornament and Lettering
For the fender ornaments, I just did the plain pony without any engine designation.  I could have got the custom Scott Drake 5.0 pony, but they were pricey and I still wanted to maintain a somewhat original or 'stock' appearance.  I went with Scott Drake pin-on emblems, but only because my fenders were original and already had the original holes in them.  However, after doing this I realized the pin-on was a mistake as the factory holes weren't always perfectly straight (or perhaps the pins aren't in the right locations).  Needless to say, some of the letters are slightly crooked, but only if you're looking hard.

I also did away with the barrel nuts, as you have to push the emblems in really hard and this will create low spots in the fender.  Instead what I did was took a round mini diamond file and filed out the holes (they will fill in from filler, primer, paint, clear coat) until the emblem pins fit in snugly.  Then I took some Mastercoat Silver and painted a glob near the base of each pin, and pushed them into place, securing them to the panel with tape.  The Mastercoat silver will dry rock hard and once it's dried, it's stuck.  So it essentially glues the emblems to the panel, only the benefit here is you won't get rust streaks running down.

Unfortunately, my Scott Drake pony emblem doesn't fit the exact contour of the fender.


Installation of Trunk Molding
I wrote these instructions for installation of trunk molding for CJ Pony Parts.  All of the molding, including this, that I've put on this car so far has been Corvex and I've been pretty happy with it.  The fit was good and overall quality was pretty good.

Installation of Trunk Lid Letters
 
The trunk lid letters were Scott Drake stick on letters.  As I mentioned earlier, I did not like these as much as the KSR stick on letters.  I also used the measurements described in the previously linked Mustangs Monthly article above.  The one dimension they do not give is for how high the letters are from the bottom edge of the trunk lid, which is 1 5/16".

(The trunk lid is not shut, just sitting)


Thursday, November 27, 2014

Cutting and buffing part II: Buffing

Buffing is a lot more rewarding than cutting to a degree, but it also makes the cutting rewarding, especially if you took your time and didn't make large jumps between grits.  Since I sanded up to 3000, a shine comes immediately after starting buffing.

For buffing I took the advice of some of the most anal pro's I know and used the same materials they did: Chemical Guys V-series 32, 34, 36, and 38 compounds or polishes.  The 32 and 34 are compounds with more cutting, while the 36 and 38 are polishes that deliver a final intense shine.

I used a rotary buffer, and for the pads I used Hexalogic 6" pads, using the orange pad for cutting and the black pad for polishing.  The orange pad is a much more dense foam with more cutting, while the black pad is a very soft foam.  I used Chemical Guy's pad wash and conditioner.  I also used a flexible backing that I also got from Chemical Guys.

Let me first say the smells of these products will keep you going if nothing else.  The conditioner smells like bubble gum and I take a big whiff every time I use some.  Each of the compounds or polishes smell glorious too, and the pad wash also smells wonderful.


My buffing process went something like this:


  1. Make sure the panel is clean; impeccably clean.  I dusted with  California Duster first, then washed down the panel with soap and water.
  2. Put three to four small drops of compound (starting with the V32) on the orange buffing pad.  Less compound is better than more.  Use too much compound and it glazes the panel and doesn't actually cut.
  3. Spray some pad conditioner on the pad.
  4. Put the buffer on the lowest speed and start running over the panel to work the compound in.
  5. Turn the buffer up just a bit faster and work in a 2x2 foot area, making slow passes back and forth and up and down until the panel starts to clear off.  I found it's not necessary to apply more compound every time you go back to make more passes.  Adding more conditioner brings more compound up out of the pad and this still cuts.
  6. Wipe off the excess with a clean microfiber rag.  I had three designated microfiber rags and I stored each in a separate labeled ziplock baggie: "Dusting" (for wiping the panel off before compounding), "Compound" (for wiping excess compound off), and "Polish" (for wiping extra polish off).  The one thing I tried to do here was keep up with wiping off adjacent panels too, however I did a very poor job at this and now looking back, I wished I would have covered the entire car with soft cotton sheets except for the panel I was working on.
  7. Clean the pad after every three applications of compound.  To clean the pad, I put 4 capfuls of pad cleaner in a garden sprayer then filled the rest up with water, hooked it up to a hose, and sprayed the pad down with this to clean out the compound.  Then I stuck the pad back on the backing pad, stuck the buffer down inside a 5 gallon bucket and turned it on high speed to spin out the water.
  8. Move to the V34 compound next, then change to the black pad and move to the V36 and then the V38.  After some time however, I questioned if I could actually tell the difference between each of these compouds (I didn't think I could), so in the end I started with the V32 to cut and then polished with the V38 and to my eyes, this didn't look any different than the panels I had used all four compounds/polishes on.
Some illustrations:
Rogue scratches like this will haunt you through the entire process.  Time to back up and resand this area.

The roof all buffed out


The 'dollar bill test'.  Unfortunately the metallic cuts down on some of the clarity of the reflection in the picture.

The hood buffed out, sans hood scoop

Buffed quarter panel.  The only bad thing about having a really shiny car is it shows all the other crap you have sitting in the shop.

Ok, so I'm really behind in this blog and have been a bit more busy than buffing, however, this is the entire car buffed out.

Tuesday, September 30, 2014

Cutting and buffing: Part 1. Cutting

Warning: what I'm about to describe is not for the faint of heart.  However, it is the method used by some of the best and most meticulous painters I know in the industry.  And it will take you hours and make you hate your life.  It has taken me hours and makes me hate my life.

In fact it is so bad that it has taken me almost a year to cut and buff my car.  And my car had hardly any orange peel; it was pretty darn smooth.  Also, I'm lazy, not motivated, and hate this.  So that makes it really hard to get out there and do it.

Well, here it goes.

Depending on how much cut is needed, I will start with 1000 grit, then go like this: 1200--1500--2000--2500--3000 Trizact on DA, and then buff.  1000 is wet with a hard block.  1200-2500 are wet with a soft block.  The paper I am using is Meguiar's Unigrit, which is actually made by Nikken.  The 1200 is Indasa, who I forgot I loved their paper.  Consequently it's the same price as the Meguiar's paper but for 50 sheets instead of 25.  I think the Indasa paper is really great.

And then I buff.  The buffing is done on a rotary buffer with Chemical Guys V-series compounds.  I buff with two different compounds--first V32, then V34, and then polish with two more compounds--first V36 and then V38.  For the compounds I am using a 6.5" orange Hexalogic buffing pad I purchased through Chemical Guys.  For two polishes, I switched to the black Hexalogic buffing pad.   I am also using Chemical Guy's flexible backing pad.  All of this (for the buffing material) ran me $200-and some change, but it's great, great stuff, and best of all, smells delicious. 

Oh, it smells so good.

For buffing pad lubricant, I'm using Chemical Guys buffing pad lubricant, which smells like liquid bubble gum in a  bottle.  I'm not even kidding.

For buffing pad wash, I'm using Chemical Guys buffing pad wash concentrate.

Other necessary materials required are:
  • California Duster (this is to clean dust off the car before working on it
  • Two buckets for washing (a clean bucket, and dirty bucket)
  • Microfiber washing mit
  • A CLEAN bucket and lid for soaking sand paper.  I went and bought a brand new 5 gallon bucket and lid for this purpose, because I wanted it to be so clean.  And the lid keeps it clean.
  • A spray bottle
  • Dish soap (for lubricant)
  • Sanding block set ( I was using select blocks from my Durablock set)
  • 6" long piece of 3/4" PVC pipe or electrical conduit, with the edges sanded smooth (you'll see why)
Cleanliness
Cleanliness of everything during this process is so critical.  Cleanliness of the water.  Cleanliness of your clothes.  Cleanliness of the bottom of your squirt bottle (don't let it sit on the ground).  Cleanliness of your hands.  Cleanliness of your panel.  I use fresh, clean softened water in my squirt bottle.  I have a dog and cats so I put on a clean shirt when I go out to sand so I don't have any hair that falls off me and gets scratched into the work.  I keep my squirt bottle hanging off the side of my bucket so the bottom doesn't get grit on it from the floor and then find its way to the work surface.  I keep my hands cleaned and sprayed off so they don't collect grit.  I keep the sandpaper sprayed off frequently.  I think you get the idea.  A tiny piece of a foreign particle finding its way under the sand paper will make a nice rogue scratch you did not intend to be there.

Cutting
By this time, any runs should already be removed, and I've already described how I did that in an earlier entry.

I just focus on one panel at a time, start to finish.  I first dust off then wash the panel.  I tape over body lines + about 1/4" extra, and tape over body gaps to keep water and sanding mud from running in there, and to protect the adjacent panel.  By this time the sandpaper should be soaked in water for a minimum of 15 minutes; in reality, my sandpaper is soaked for days as a sheet or two of each grit just lives in the soaking bucket, and I freshen up the water frequently. 

If the panel has a lot of urethane wave (where the clear coat looks kind of squiggly and wavy) I start with 1000 grit on a hard block.  I notice urethane wave the most where the lighting wasn't adequate and I really hosed too much clear coat on, or else I was cramped and holding the gun too close and hosed on the clear.  Either way, the good thing is there is a lot of mil build of clear there so it's forgiving to remove a lot of material.  I constantly spray the panel with sudsy water from the squirt bottle, sanding in a back and forth motion, front to back.  The sandpaper needs to be sprayed off frequently as well to clean off the sanding mud.  I avoid sanding in a diagonal pattern and I move in a front to back motion that follows the panel.  The reason is, if you don't get good enough scratch cancellation or don't buff thoroughly, diagonal scratches pop out much more than a scratch that runs along the direction of the panel.

One of the most important things to sanding is silence.  Silence is so critical because you need to be able to hear that little piece of grit that gets stuck under your paper.  It will make a high pitched squeaking sound, and you'll get real pissed every time you hear it.  Sand with some music on and you could be working that grit along the panel the entire time you were sanding it.  Which is another benefit to frequently spraying down the panel and paper.

When I start a new panel, I've found the sandpaper really tells you how much more it needs to be sanded based on the sound and feel.  When you first start cutting the clear coat, it feels real slick, hard, and bouncy as the sandpaper just wants to glide over the top.   Eventually as you cut in the feel changes to a little more controlled, with more friction, which means you've broken the skin of the clear.  I also just use real light pressure.  Almost just the weight of the block and let the sand paper do the cutting without me forcing it.  This is also safer in case a piece of grit finds its way under there.  I can also physically feel high and low areas in the clear where I've cut it flat and where it needs to be cut flatter.  It will still feel thick and wavy.  The other piece to this is I've also found when moving to a finer grit of paper, you'll feel less and less resistance in the paper as you remove material and have sanded away the larger grit scratches.  This is also accompanied with a change in sound of the sanding.  I noticed the sound changed from a 'coarser,' louder sanding sound to a 'finer' quieter sanding sound as the larger scratches got cancelled and the surface becomes one uniform grit.  I have started using these as guides to know how long I need to sand an area.

Stay away from corners and edging when sanding, these are easy places to break through.  If you do break through anywhere, you are re-basing that spot, and then re-clearing the entire panel.

To get into the compound curve areas, I use my 3/4" round PVC hardblock with the ends sanded smooth to a bevel, and wrap the paper around this.

When I think I'm done with 1000 grit on a bad panel, I blow dry it off, and this will reveal any imperfections that need to be sanded more.  I don't try to completely remove all the orange peel on the first pass.  Keep in mind there are still going to be a number of other grits to follow, and all will remove material to some degree.  This approach keeps more clear on the car.

If I'm done, then I move to 1200 grit, and this is for the sake of cancelling out the 1000 grit scratches.  Here what I've found works real well is to take a soft block (such as a 3x5 block) and use an old 3M Trizact pad cut to the same size as the sandpaper as an interface pad.  I put the sandpaper over this and hold both of them to the block as I sand, using the same techniques as before.  When I switch to the roundblock, I just wrap the interface pad/sandpaper halfway around the block and start sanding.  1200 is the grit I normally start with if there is just regular surface imperfections such as dust nibs and only minor orange peel.

After this it's the same thing all the way up through 2500.  Expect to take a lot of time with the 1500 and the 2000.  The grits at this point are getting very fine and becomes more difficult to cancel out previous scratches.  And before every new grit, the panel gets washed off and cleansed of sanding mud.

Finally, after 2500, I move to a 6" 3M Trizact 3000 pad on an electric DA polisher with an interface pad.  An interface pad is a soft pad about 1/2" thick with velcro on both sides; one side of it sticks to the backing pad of the DA, the other side is what the Trizact pad sticks to.  This interface pad allows the sanding pad to conform to the surface profile of the car better. 

Sanding with 3000 will remove all the sanding striations and make it have one uniform, 'scuffed' look; in fact it will have a slight gloss to it.  This sanding is done quasi-dry.  The pad should just be damp, and the panel should be dampened with a few spritzes of water.  Too much water and the pad won't do its job.  I sand at a medium speed, move slowly back and forth across a section of the panel, overlapping by 50%.  The more time I spend here with 3000, the easier time I have buffing, so I go back over myself 3-4 times, switching between going back and forth across the panel to up and down along the panel.

At this point it's a very happy point, because I've now probably got several hours (or more) into sanding the panel, and now it's ready for buffing.

But I'm not going to lie, I am so tired of writing this up I'm going to end it here and pick up on buffing at another time.

Tuesday, July 1, 2014

Installing 3 point seat belts

I'm going to make another lazy post again and show the instructions I wrote for CJ's.  But when I put so much effort and detail into writing these instructions, I just don't feel like writing them again.

Three point seat belts are an important safety upgrade for any car that doesn't have them...right up there with installing a dual master cylinder and maybe even power disc brakes.  And there's a lot of jabber online about which seat belts to get, and how to install them, up at the roof or down lower on the inner quarter.  I opted to go for the lower route as it felt better across my shoulder, and I think it looked kind of bad with the seat belt hanging in the window when it wasn't in use.  A lot of people say something about spinal compression, which I'm about to baselessly go on record and say is nonsense.  While I could be completely wrong, my gut feeling is somebody, somewhere on the internet stated this, or maybe even pondered it, and then everybody else picked it up and ran with it.  If it were a truly dangerous configuration, I can not see how the NTSB would still allow for such a configuration to still be marketed and sold, or even approved by NTSB.

All that rant aside, here is how I installed these.


Sunday, May 11, 2014

Installation of quarter window weatherstripping and vent window weatherstripping

This posting is going to be a real lazy post for me.  Since I already wrote the installation instuctions for CJ Pony Part's site, I'll link to those instructions.  Besides, they're better than the documentation I normally do here anyways...because I'm lazy at this stuff.

One note...I used Ford tooling weatherstripping for both (also shown in the links) and highly, highly recommend this route.  Generally Ford tooling parts come at such premium and most of us just can't justify the cost.  But for something small like this, where you might be looking at $30 compared to $15 for an import, it's still doable.   For such a small premium, the window seals play an extremely important roll--exact fit ensures no leaks or whistles.  And they're made in the USA.
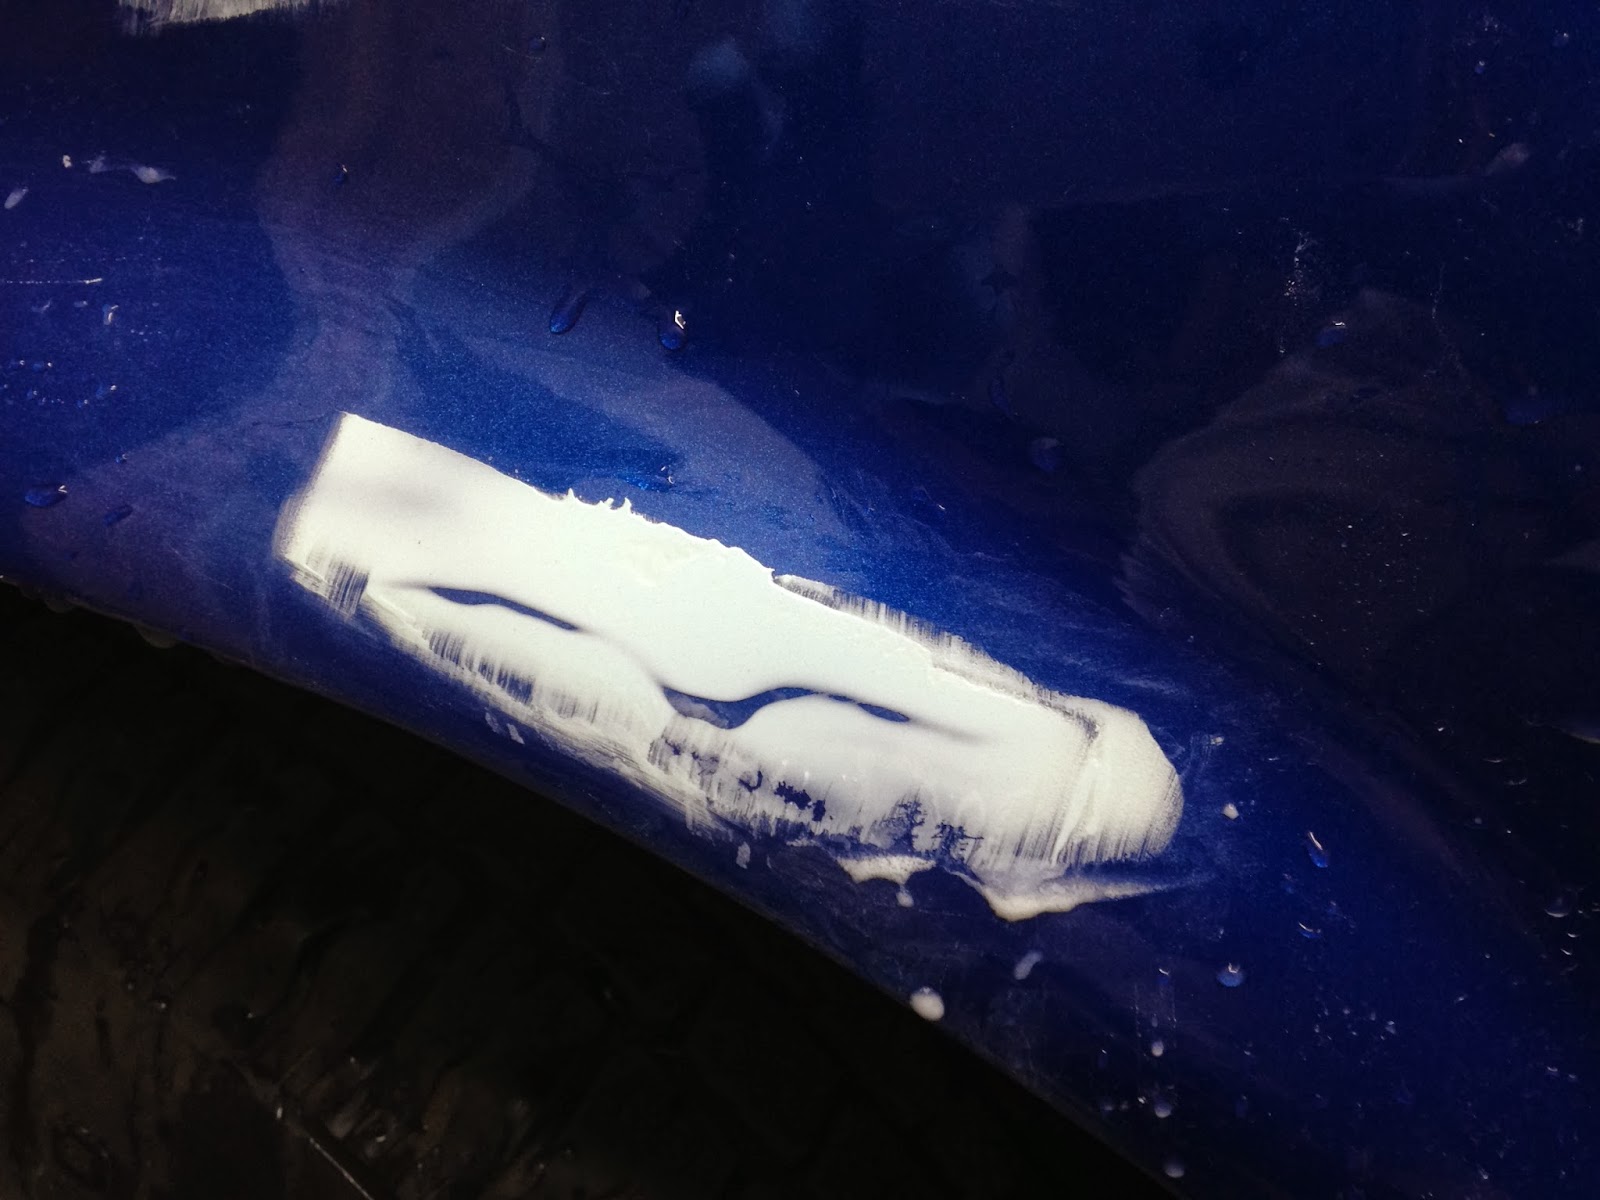
Vent window seal installation


Quarter window seal installation


Sunday, February 9, 2014

Blog Brief: Sanding out a run

When spraying a car, especially the clear coat, runs--formally known as 'flow indicators,'--are inevitable.  Because I was hosing my clear on and also had some inadequate lighting on one side of the car, I had my share of runs to work out...some that ran along the entire length of the body lines on the door and fender!

There are a number of ways one can sand out a run: scraping with a utility knife blade, putting tape over the run and sanding the tape, taking a tiny block and trying to sand the run and only the run, or--my preferred way (and the way I'll describe here)--skimming the run with glazing putty and wet sanding.

The goal in sanding down a run is to protect the surrounding clear so the run and only the run is being sanded.  Skimming the run with glazing putty protects the surrounding area so only the run is being sanded.

Here on the passenger side I have skimmed a coat of glazing putty, such as Evercoat Easy Sand.   The thinner the coat the better as it will be less sanding effort to sand it off.

Start WET sanding with 320 on a HARD block.  I cut about an inch length of paint stick and this was a tiny block I used.  I also used a short piece of 1/2" PVC pipe or a wooden dowel for round blocks.  You can see exactly where the run is and how the high parts of the run only are getting sanded down.

Continued sanding and the run is 90% removed.  After a little more of the putty is removed, then switch to 1000 grit wet and finish sanding the run and remaining putty.


Sunday, February 2, 2014

Dash cluster and bezel restoration

This will be a short and sweet entry...my favorite kind.  This was actually a short and sweet job.  I did all the work here in about two hours at the comfort of the dining room table.  And my wife probably actually enjoyed it because she was sitting at the table working on her own thing (so it meant we could 'be together.')

My dash cluster wasn't actually in that bad of shape to start with, but it was pretty dusty by this point with lots of paint dust on it:


The dust cleaned off easy enough and I unscrewed the front of the bezel from the cluster.  I cleaned the gauges with a detailer spray (only because I had it, nothing strategic to this choice....really).  I'll repaint the speedometer needle with a flourescent needle paint of the right Ford color--this is on order.

The black painted part of the plastic cleaned and shined up great just in wiping it down with Armor All after cleaning the dust off.

I then replaced all the plastic bezel lens with new Scott Drake lens which look great and look and fit exactly like the originals.

Finally, the chromed plastic was polished with the white rouge compound of the Eastwood polishing kit I have described previously.  This removed all the little black pits in the chrome plating as well as some green oxidation-looking stuff.  The trick is not to dwell too long in any one place as it is possible to burn through the chrome.  After buffing, I wiped down with a chrome wheel polish and the chromed plastic now looked brand new. 

This is some of the crap on the edge of this bezel.  It won't just wipe off, even with chrome polish.

After buffing, not only was it completely gone, but this looked brand new.


Assembled and good as new.


Thursday, November 28, 2013

New product review: Mastercoat Metal Prep

Some time ago, I was sent a goodie bag of refinishing chemicals to evaluate and play with.  One of them grabbed my attention in particular and has made itself a frequently referred to, permanent fixture in my shop. 

It is a phosphoric acid-based metal prep distributed by Mastercoat.  Much like Ospho only better, Metal Prep also contains a detergent for cleansing action of your dirty parts as well as a higher concentration of phosphoric acid.  Oh, and it's REUSABLE.  Its presentation is a yellow liquid and it is pretty potent stuff.  It has a sweet smell and some noxious fumes associated with it.  Personal protective equipment should involve safety glasses, gloves, and a respirator, which are standard fixtures in my shop.  Before I continue, I should include the disclaimer of always follow the tech sheet of any products you are using, including the metal prep, and especially other products that may be used in conjunction with phosphoric-acid containing metal preps.

This is especially great for cleaning up rusty bolts, nuts, clips, etc, to like-new condition in as fast as an hour.  I keep a small Gladware container in the shop with a few inches of depth of the Metal Prep.  When I need to clean up some bolts I just toss them in there and check on them in 30 minutes to an hour, if not sooner. 
Here I have some rusty clips soaking.

This is a 'before' and 'after' with a comparative sample.  The clip will go from rusty and grimy on the left to clean and like-new in under an hour.

These are the same rusty clips shown soaking above.  They now look new, and are nicely prepped for Parkerizing.

But this also has other ways I put it to use to besides soaking small parts.  It's especially useful for removing heavy rust in hard to get areas, especially where you couldn't fit a sander or a blaster.  For instance, on the inside of this door:
This was the inside of the driver's side door skin.

I wiped the area down liberally with the Metal Prep, then laid out SATURATED paper shop towels, smoothing them out as much as possible to make full contact.  I occasionally continued to add more solution to keep the towels wet.

After sitting overnight, I peeled the towels off the next day and the majority of the rust was gone.  The remaining rust you see was black from the chemical conversion process that occurs with iron oxide and phosphoric acid.  The paper towels were quite difficult to peel off the next day as they had mostly dried and then stuck to the metal.  After it was completely dried, I brushed on two coats of the Mastercoat Silver permanent rust sealer.


Saturday, October 19, 2013

Paint part III: Spraying clear coat

The last part of a paint job, if doing a basecoat/clearcoat system, is spraying the clear coat.  This is what separates the boys from the men, where the car comes out looking like a show car or a dud.  For the task, I used SPI's Universal Clear, a high solids show-caliber clear, and probably one of the best for the purpose one can get.

The clear should go on the base very soon, usually within 24 hr or whatever the tech sheet states.  Alternatively one could use an intercoat clear, which goes on over the basecoat, and then is scuffed when the clear coat is ready to be applied.  However, there is one secret even the paint reps won't tell you (they're actually instructed not to tell), and that is--as long as the car is not removed from the booth so the base is exposed to UV and contaminants--SOME bases can sit indefinitely before the clear goes on, but it all comes down to the polyall used in the base.  I really exploited this as my car sat in base for several weeks.  I'm writing this here for my own archival purposes...for anyone else, just pretend you didn't read that last part.   Thinking of using that cheap, economy line base coat?  Situations like this is where you'd run into problems.

I sprayed about a gallon and a quart kit of clear on the entire car, over 3 coats.  This came to 2.5 sprayed gallons.  I was using slow to medium activator for the clear, which is mixed 1:1.  I had ordered the slow as I was thinking I would be doing the clear in much warmer weather, however the slow is still ideal for most temp ranges.  If faced with two different speeds of an activator or reducer to use in the same job, always spray the fastest one first.  The temp when spraying was in the 60's, letting 30 minutes of flash between coats.

I used an LPH400 with silver cap to spray, gun settings were 28 psi, fluid backed out 2.25 turns, and fan about 90%.  I mixed up 1.5 quarts at time to spray (not all of it is poured into the gun at once) so I could spray almost continually without having to stop to fill up more.  The decklid was removed and set aside so I could clear the trunk jam; the decklid will be cleared later.  The headlight buckets had also been removed so I could get better coverage on them with base, and they will be cleared separately also.

The adage goes spray it how you want it to look.  Well I wanted the car to look really wet.  I was also afraid of dry spray so was more willing to push it to a run in order to assure it wasn't dry enough.  These are called 'flow meters.'  Well my flow was working very well, and I got some pretty horrific runs on the passenger's door right under the top C body line, which will be a devil to run out.  It was technique that created this run as I went over it too many times trying to get coverage.  I'll have to deal with these when the time comes.  I had runs in other places too, but every painter gets runs, in fact the pro's expect at least several.  They are a lot easier to fix than dry spray.  With that being said, I do have some areas that also went on dry, or that I almost missed altogether, such as front and center of the hood.  I may have to reclear the hood. 

One other thing...the car should be tacked off very well several times before spraying clear, but never after the first coat goes on.  Now onto the pics.