One of the latest chronicles in my Mustang adventure has been to replace a badly dented/damaged B pillar or sail panel, whichever you prefer to call it. The damage was hidden by 1/2-3/4" filler. When it was removed it revealed a panel that could be used as landscaping for a model train set mountain range. After going around and around with a variety of fixes, I finally opted to replace the panel skin.

We start by showing the damaged B pillar on this 67 coupe. You can see I was quite literal in my model rail road mountain range description.

This is one of the few body panels that you cannot get reproduction. I called up CJ Pony parts and had them send me a replacement B pillar from a donor car in their salvage yard. I was just expecting the panel itself, but as you can see from what they sent me, they weren't messing around. That chunk of car was $175 shipped.

I removed the paint with a wire wheel on an angle grinder. There were a few small spots of some deep set rust so I spot blasted these with a panel blaster using aluminum oxide media. The leader filler along the quarter panel seam is melted off onto some foil using a propane torch. After studying the panel carefully, I plan where to make the cuts and exactly what part of the panel I'm going to remove and transfer. I mask off where the cuts are going to be with tape. I will be going about an inch below the body line, and for two reasons: the metal is somewhat reinforced here since it's near the body line, and the body line provides and easy point of reference. I will be cutting the bottom just above the seam where the quarter panel butts in under the B pillar.

I carefully remove the spots welds along the back glass channel. My preferred method for removing spots welds is making a small pilot indent with a small drill bit then cutting the spot weld with a spot weld cutter. Alternatively, I also grind the spot weld away with a pneumatic cut off wheel. The latter method provides a safer bet at leaving an intact mating surface. I cut the spot welds from the underside of the panel since I want the actual sail panel itself intact. Avoid using an air hammer in steps like these to remove the metal after the welds are cut; it tends to distort the metal too much. Instead, I use my small pry bar (about the size of a flat head screw driver) and carefully pry the metal apart. It leaves a nearly perfect intact surface.

I make my cuts along my tape, and make a final cut along the inside corner of the rain gutter and the panel is completely removed.

My cut will be wrapping around the back corner of the panel and running right along this seam near the top of the back glass channel. It provides a good point of reference for removal of both panels and installation of the new panel. The new panel over the old panel shows how both are exactly the same.

The removal of the damaged panel is going to be nearly the same. I take a DA and sand on the body line to expose it. The old panel too was taped off and the new panel is placed over the old panel for a test fit. I chopped the back edge of the sail panel off so the new panel would fit over it better and more accurately. Then I made my traces as to where my cuts will be.

The damaged panel is cut out.

This is the back of the damaged panel showing the creases from the dents and just exactly how difficult/impossible this would have been to repair without panel replacement.

I remove or neutralize rust and corrosion with a wire wheel/angle grinder followed by zinc phosphate treatment.

Now I need to replace that section of damaged drip rail molding. I cut the damaged section from the car, and cut the replacement section from the chunk o' car from CJ.

I shoot the B pillar guts with 2 coats of Eastwood Rust encapsulator.

Since too much of the original drip rail was gone or cut away, I had to fabricate a patch so I could have something to mount the new drip rail molding too. I punch a series of holes in it with a pneumatic hole punch for plug welds.

I attach the patch with plug welds and grind them down smooth.

Second picture: I then weld in the new drip rail molding.

The replacement panel too then got several coats of Eastwood Rust Encapsulator on the rusty backside. Now the panel is fit. At this point I check everything, then recheck. Then check again. I use panel clamps to help maintain spacing and hold the panel. I begin the welding process with a series of carefully placed and spaced tack welds to avoid warping the panel. It is critical to let these welds cool NATURALLY, otherwise the metal will shrink.

After lots and lots of time (mostly waiting for welds to cool) the entire panel is welded in with a series of tack welds. All the welds are ground as smooth as possible. I use a flap disk on an angle grinder and do not grind too long in one spot as I want to avoid getting the metal to hot and causing warpage. I also let the panel cool naturally after I've been grinding on it for awhile.

I finish the process by making my plug welds along the back glass channel. These welds too will be ground down smooth.

After all the welds are completed, I fill over the welds with Evercoat fiberglass body filler. Fiberglass should always be used over a weld on a body panel as fiberglass filler is waterproof and will seal pinholes. Since I lost part of the body line because it was shrunken where the weld was, I recreated it by shaping the body line in the fiberglass. This actually went considerably easier and better than I had anticipated.

I feather the filler and smooth the body line to make it match the rest of the line on the panel. I skim over the fiberglass with 3M lightweight filler to fill low spots and create a level surface. This is creamier and easier sanding than fiberglass so it's used to create a better finishing touch. Any small holes, sanding scratches, or other imperfections will be filled in with Evercoat Easy Sand glazing putty.

 We start by showing the damaged B pillar on this 67 coupe. You can see I was quite literal in my model rail road mountain range description.
 This is one of the few body panels that you cannot get reproduction. I called up CJ Pony parts and had them send me a replacement B pillar from a donor car in their salvage yard. I was just expecting the panel itself, but as you can see from what they sent me, they weren't messing around. That chunk of car was $175 shipped.
 I removed the paint with a wire wheel on an angle grinder. There were a few small spots of some deep set rust so I spot blasted these with a panel blaster using aluminum oxide media. The leader filler along the quarter panel seam is melted off onto some foil using a propane torch. After studying the panel carefully, I plan where to make the cuts and exactly what part of the panel I'm going to remove and transfer. I mask off where the cuts are going to be with tape. I will be going about an inch below the body line, and for two reasons: the metal is somewhat reinforced here since it's near the body line, and the body line provides and easy point of reference. I will be cutting the bottom just above the seam where the quarter panel butts in under the B pillar.
 I carefully remove the spots welds along the back glass channel. My preferred method for removing spots welds is making a small pilot indent with a small drill bit then cutting the spot weld with a spot weld cutter. Alternatively, I also grind the spot weld away with a pneumatic cut off wheel. The latter method provides a safer bet at leaving an intact mating surface. I cut the spot welds from the underside of the panel since I want the actual sail panel itself intact. Avoid using an air hammer in steps like these to remove the metal after the welds are cut; it tends to distort the metal too much. Instead, I use my small pry bar (about the size of a flat head screw driver) and carefully pry the metal apart. It leaves a nearly perfect intact surface.
 I make my cuts along my tape, and make a final cut along the inside corner of the rain gutter and the panel is completely removed.
 My cut will be wrapping around the back corner of the panel and running right along this seam near the top of the back glass channel. It provides a good point of reference for removal of both panels and installation of the new panel. The new panel over the old panel shows how both are exactly the same.
 The removal of the damaged panel is going to be nearly the same. I take a DA and sand on the body line to expose it. The old panel too was taped off and the new panel is placed over the old panel for a test fit. I chopped the back edge of the sail panel off so the new panel would fit over it better and more accurately. Then I made my traces as to where my cuts will be.
 The damaged panel is cut out.
 This is the back of the damaged panel showing the creases from the dents and just exactly how difficult/impossible this would have been to repair without panel replacement.
 I remove or neutralize rust and corrosion with a wire wheel/angle grinder followed by zinc phosphate treatment.
 Now I need to replace that section of damaged drip rail molding. I cut the damaged section from the car, and cut the replacement section from the chunk o' car from CJ.
 I shoot the B pillar guts with 2 coats of Eastwood Rust encapsulator.
 Since too much of the original drip rail was gone or cut away, I had to fabricate a patch so I could have something to mount the new drip rail molding too. I punch a series of holes in it with a pneumatic hole punch for plug welds.
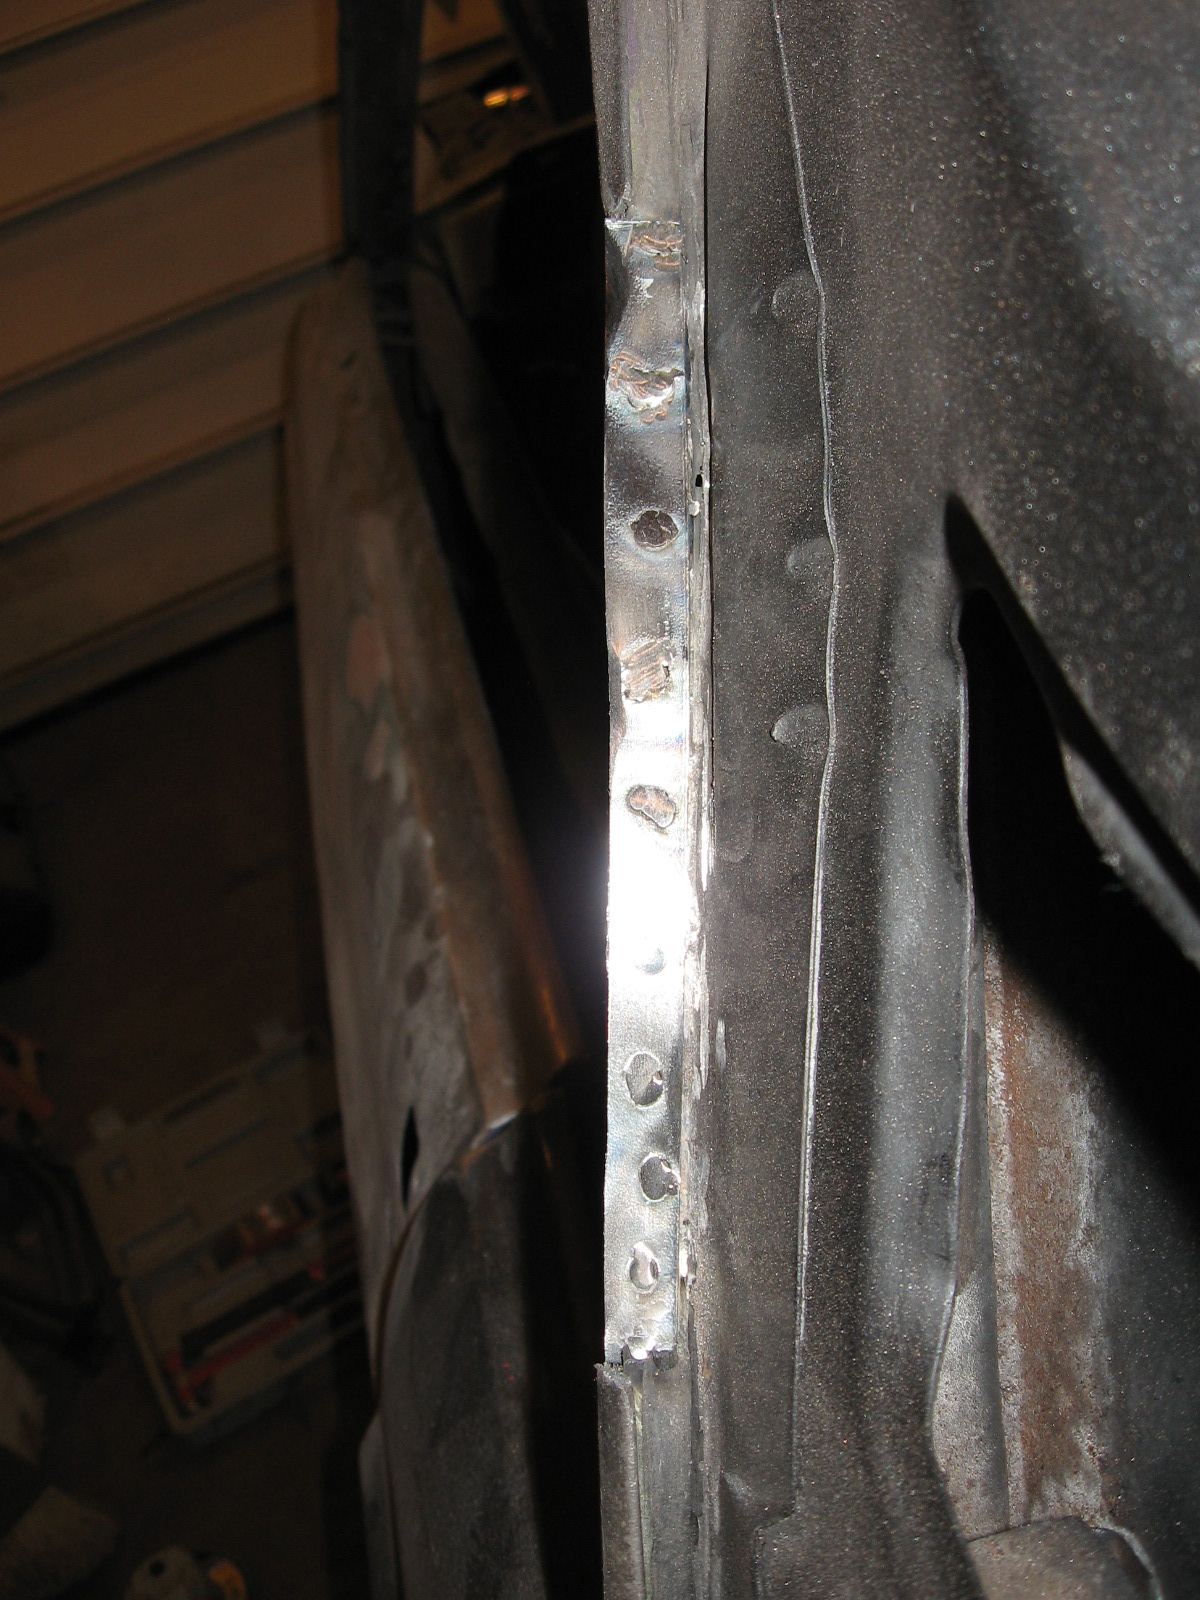 I attach the patch with plug welds and grind them down smooth.
 Second picture: I then weld in the new drip rail molding.
 The replacement panel too then got several coats of Eastwood Rust Encapsulator on the rusty backside. Now the panel is fit. At this point I check everything, then recheck. Then check again. I use panel clamps to help maintain spacing and hold the panel. I begin the welding process with a series of carefully placed and spaced tack welds to avoid warping the panel. It is critical to let these welds cool NATURALLY, otherwise the metal will shrink.
 After lots and lots of time (mostly waiting for welds to cool) the entire panel is welded in with a series of tack welds. All the welds are ground as smooth as possible. I use a flap disk on an angle grinder and do not grind too long in one spot as I want to avoid getting the metal to hot and causing warpage. I also let the panel cool naturally after I've been grinding on it for awhile.
 I finish the process by making my plug welds along the back glass channel. These welds too will be ground down smooth.
 After all the welds are completed, I fill over the welds with Evercoat fiberglass body filler. Fiberglass should always be used over a weld on a body panel as fiberglass filler is waterproof and will seal pinholes. Since I lost part of the body line because it was shrunken where the weld was, I recreated it by shaping the body line in the fiberglass. This actually went considerably easier and better than I had anticipated.
 I feather the filler and smooth the body line to make it match the rest of the line on the panel. I skim over the fiberglass with 3M lightweight filler to fill low spots and create a level surface. This is creamier and easier sanding than fiberglass so it's used to create a better finishing touch. Any small holes, sanding scratches, or other imperfections will be filled in with Evercoat Easy Sand glazing putty.